How to Grow Sweet Potato Slips: Water or Soil, Step by Step
Start sweet potato slips about six to eight weeks before you expect to plant them outside. If your local last-frost date is May 15, that puts the starting window around March 20 to April 3—but the calendar is only half the decision: sweet potatoes need warmth, and a cold balcony can undo a head start.
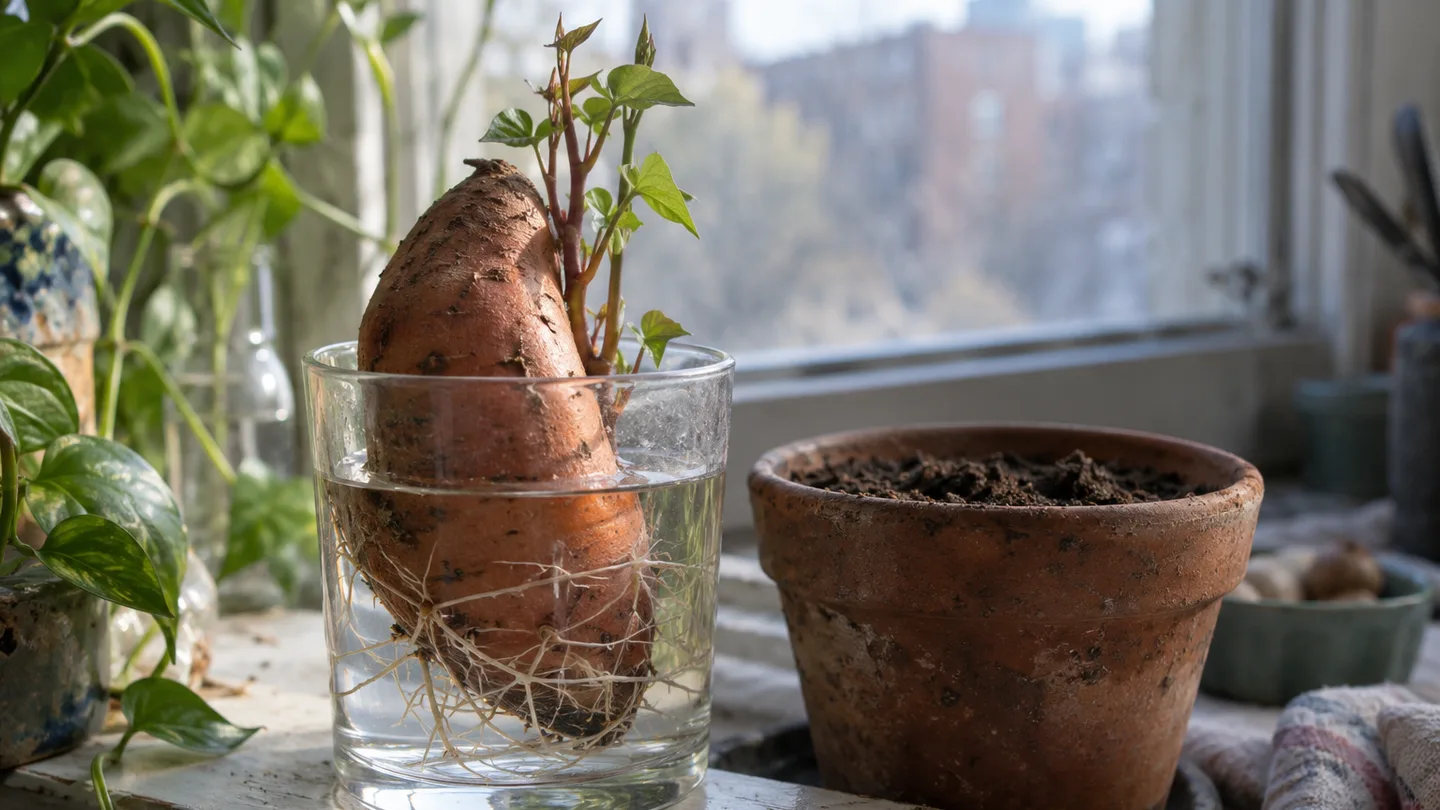
Here’s how to grow sweet potato slips in water or soil, how to tell when a shoot is ready to separate, and what to do while outdoor conditions catch up. The goal is not to force a tuber into a schedule. It’s to raise sturdy shoots and keep them in good shape until the container is ready.
Count back 6–8 weeks from planting day
Pick a likely outdoor planting window first, then count backward. Your local last-frost date is a useful starting point, not a planting appointment: sweet potatoes are warm-season plants, and cold soil or chilly nights can stall newly planted slips. I’d rather plant a little later into warm conditions than put tender slips outside early just because a date on the calendar has arrived.
For example, if you expect to plant around May 15, counting back six weeks gives you about April 3; counting back eight weeks gives you about March 20. That gives the tuber several weeks to sprout and leaves time for shoots to root. If your spring stays cool, use the later part of that start window and plan to hold the slips indoors if necessary.
Before you start, check two things for the place where the final pot will sit: whether frost risk has passed and whether the soil in the container can warm to around 65°F (18°C). Mild nights matter, too. A slip that has grown happily indoors still needs a gradual transition outdoors, not a sudden move into cold wind.
In a small-space garden, the start date is also a space decision. A tuber with several shoots can occupy a warm windowsill for weeks, and rooted slips need light while they wait. If you don’t have room to keep them bright, start closer to the later end of your window rather than producing shoots before you can house them.
Choose a firm tuber—and decide how many to start
Choose a sweet potato that feels firm, with no leaking, sunken soft spots, or fuzzy growth. A compact tuber is easier to balance in a jar or set into a small tray than an oversized one. It doesn’t need to be pristine; a small dry scar is different from tissue that is soft, wet, or spreading.
For the most predictable starting material, look for planting stock sold as disease-free or certified, where available. A grocery-store sweet potato may sprout, but the variety and its growing history may be unknown. You may also not know whether handling intended to discourage sprouting was used. That makes a supermarket tuber a reasonable experiment, not the one I’d build a carefully timed planting plan around.
Don’t decide how many final pots to prepare by assuming one tuber will give you a fixed number of usable slips. Shoots can emerge at different times, some may be too small or weak to keep, and warmth and tuber condition affect what you get. If you want more than one container, start more than one sound tuber if space allows; treat the extra as insurance, not a promised surplus.
A practical planning example: for one large container, start one tuber and keep a second only if you have a bright place for it. That gives you a backup without crowding the windowsill with more shoots than you can root. If both produce plenty, you can give the extras away or pot them on temporarily rather than squeezing every slip into one crop pot.
Water or soil? Two routes, one warm starting point
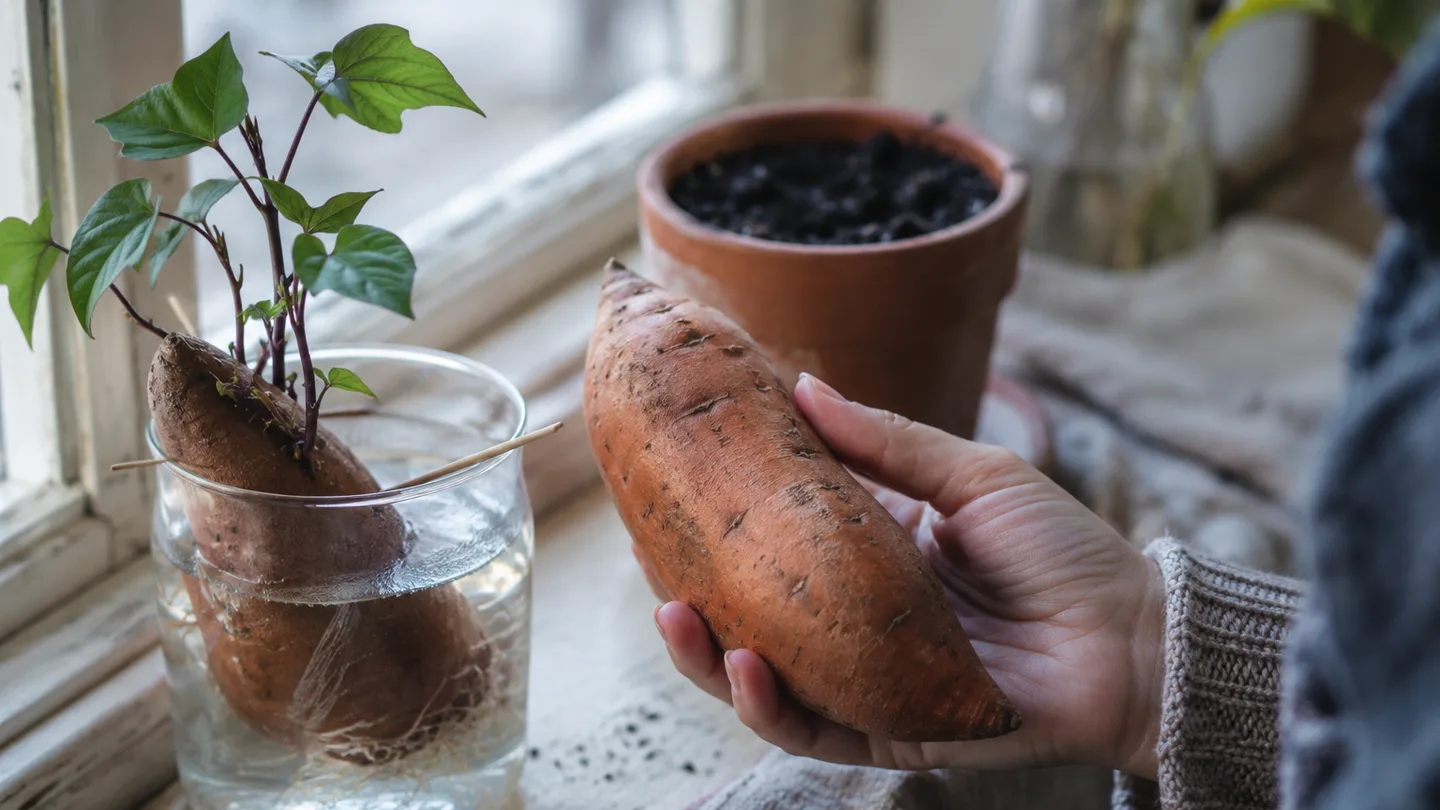
Both methods can produce slips. Water makes the developing roots easy to see and is simple to set up with a jar; soil avoids the need to keep a tuber balanced over a vessel and gives you a less splash-prone station. Neither method can compensate for a cold location or a tuber kept persistently wet.
| Method | Setup | What it makes easier | Watch for |
|---|---|---|---|
| Water | Suspend roughly the lower third of the tuber in water, using toothpicks or a narrow-necked jar to hold it. | Seeing roots develop and noticing whether the submerged tissue stays firm. | Stagnant water, a slipping tuber, or too much of it submerged. |
| Soil | Set about half the tuber into lightly moist potting mix in a container with drainage. | A stable setup with no jar to balance or water to spill. | Mix that stays saturated or dries completely before shoots appear. |
In water, keep the tuber from sitting entirely below the surface. The exposed portion needs air, and a jar that holds the whole tuber underwater leaves more tissue wet than the setup requires. Check the water regularly and refresh it if it becomes cloudy or develops an unpleasant smell.
For soil, use a pot or tray with drainage holes. Set the tuber partly into the mix, then water enough to moisten the surrounding medium without leaving it swampy. The medium should feel damp when you press a finger into it, not like mud. If water runs out of the bottom and the mix remains soaked, pause before watering again.
If you want the simplest start, I’d choose soil when you already have a small draining pot and potting mix; choose water if watching roots helps you judge progress. That’s a convenience choice, not a promise that one route makes more slips. I wouldn’t use gravel in the bottom as a substitute for drainage holes: the excess water still needs somewhere to leave the container.
Whichever route you choose, place the tuber on its side if you can’t tell which end should face up. The shoots can emerge from more than one point, and laying it sideways avoids making orientation a puzzle. Keep the setup stable so a jar can’t tip or a partly buried tuber can’t roll out of the mix.
Keep the tuber near 75–85°F (24–29°C), not on a cold sill
A warm spot is the part of the setup I’d prioritize before adding more equipment. Aim for roughly 75–85°F (24–29°C) around the tuber. A bright room may still have a cold windowsill: glass and the surface beside it can feel much colder than the air a few feet into the room. Set the jar or pot back from chilly glass, and move it if the tuber itself feels cold for long stretches.
Warmth and light do different jobs. Warmth helps the tuber get moving; once shoots appear, bright light helps them grow sturdier rather than stretching into long, pale stems. A warm location out of direct, drying heat is a better compromise than placing the tuber against a radiator or in harsh sun behind glass. If the spot is warm but dim, move the shoots toward a brighter window as they emerge.
With the soil method, check moisture by touch instead of watering on a fixed weekday. If the top feels dry but the mix below is still slightly damp, wait and check again. If the whole pocket around the tuber feels dry, water lightly. A constantly soaked mix limits air around the tuber; a bone-dry mix can leave new growth struggling before it gets established.
Don’t mistake slow growth for a request for more water. Cool conditions can slow sprouting, while persistent wetness can soften the tuber and encourage decay. Keep the spot warm, give emerging shoots light, and make the next watering decision from the feel of the mix—or the condition of the water and submerged tissue—not from impatience.
A slip is ready to separate at about 6–8 inches (15–20 cm)
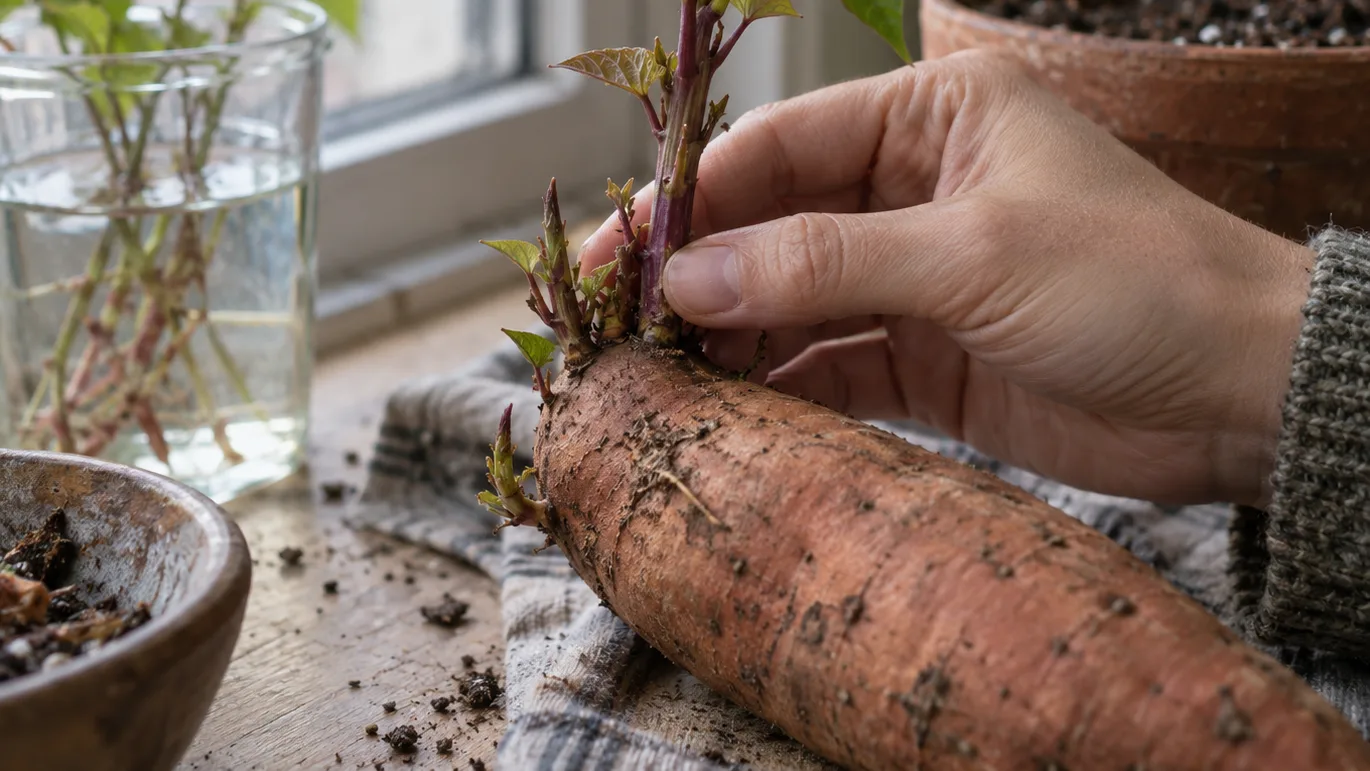
Look for a shoot around 6–8 inches (15–20 cm) long with several leaves and a stem sturdy enough to handle. That length is a useful cue, not a ruler test: a firm, leafy shoot can be ready a little shorter, while a long, thin shoot may still need better light before you handle it. Tiny nubs are not yet useful slips.
To remove one, hold the tuber steady and gently twist the shoot where it joins the tuber. If it resists or the base is delicate, use clean scissors to cut it close to the tuber without crushing the stem. Avoid yanking small shoots off in a hurry. They can tear, and the tuber may have other developing growth you want to leave intact.
Not every shoot will be ready at once. Remove the strong ones and leave the smaller ones attached to grow on. If a shoot is very stretched and pale, improve its light before expecting it to become a robust transplant. A leafy stem with a sound base is easier to root and move than a long, limp one.
Keep detached slips out of direct sun while you prepare their rooting vessel. The leaves lose water faster than a newly separated stem can replace it, so don’t leave them lying on a warm counter while you finish other jobs. Move directly to rooting, and keep the leaves above the waterline if you use a jar.
Give detached slips time to root before they meet the container
Stand each slip in a clean glass or jar with the lower stem in water and the leaves above the surface. Or set the stem into moist potting mix in a small pot. In either case, give it warmth and light, then wait for roots you can actually see or feel rather than planting a bare stem simply because a week has passed.
Rooting often takes roughly one to two weeks in warm conditions, but the slip’s condition and the room temperature affect the pace. Look for new pale roots branching from the lower stem. If you use water, change it when it looks cloudy or smells stale, and rinse the vessel. Submerged leaves can break down, so strip off any leaf that would sit underwater.
For a short weather delay, rooted slips can wait in a bright, warm place with their roots in clean water or moist mix. Check them every few days: top up water if the roots are exposed, and feel the mix if they’re potted. A slip that is waiting should remain leafy and firm; if it starts to wilt, inspect the roots and moisture before adding water automatically.
I prefer to root slips separately rather than keeping a crowded bundle in one jar. It’s easier to see which stem is doing well, and the roots are less likely to tangle when you move them. If you do use one vessel for several slips, leave enough room to lift each one without scraping its new roots against the others.
Move outside only after frost risk passes and soil reaches about 65°F (18°C)
Before planting, check the forecast and the container soil. Wait until frost risk has passed, the soil is near 65°F (18°C), and nights are staying mild; around 55°F (13°C) or warmer is a useful guide. If the forecast swings back to cold nights, keep the slips protected for a little longer. Warm afternoons alone don’t tell you what the roots will experience after sunset.
Sweet potato slips and the final crop pot are two separate planning problems. A small jar can raise a slip, but a productive plant needs far more root room. For a container, about 15–20 gallons (57–76 L) is a sensible starting range to plan around. That is a substantial pot on a balcony, so check the space, drainage path, and load your balcony can safely support before filling it. The right capacity also depends on the container’s shape and how many plants you intend to grow.
When the site and pot are ready, move the slips outdoors gradually over several days. Start them in a sheltered bright spot, then expose them to more direct outdoor conditions as they adjust. This gives leaves time to adapt to stronger sun and wind. If a cold snap or harsh wind is forecast, bring the pot back to shelter if it is manageable, or protect the plants rather than leaving newly transplanted slips exposed.
- Moisten the potting mix before planting so the root zone is evenly damp, not waterlogged.
- Make a hole deep enough to settle the roots without bending them sharply.
- Set the slip in place with its roots below the surface and its leaves above it. Firm the mix gently around the stem.
- Water around the plant to settle the mix, then check that excess water drains freely.
- Keep an eye on it over the next few days. If it wilts, check the soil and exposure before deciding whether it needs more water.
Don’t bury the leaves to make a shallow hole work. Adjust the hole for the roots, or loosen the mix beneath them, so the leafy top stays above the surface. Once planted, the slip may pause while it adjusts; a sound stem and new growth are better signs of progress than expecting it to look unchanged from day one.
If you’re still choosing a crop and container, our 30 best vegetables to grow in buckets is a useful comparison for deciding what deserves a large pot. For other edible container ideas, see Easy fruits and vegetables to grow in pots. Neither list changes the key trade-off here: sweet potatoes occupy meaningful floor space for a long stretch, so I’d reserve the biggest sunny container for them only if you genuinely want this crop.
For local timing, consult regional frost-date and spring soil-temperature guidance, then check the actual forecast and soil where your pot will sit. A calendar estimate can narrow the window, but the balcony’s exposure and the season’s weather decide the final move.
Read the stalled sprout: cold, dry mix, or rot leave different clues
No growth after several warm weeks: Check the tuber’s temperature and firmness first. If it has been sitting on a cold sill, move it somewhere warmer and give it time. If it is firm and the medium is only lightly moist, more water is not the next step. A tuber that remains sound can simply be slow; inspect again in a week rather than discarding it because the calendar feels late.
A shrivelling tuber: Check whether the water level has dropped below the submerged portion, or whether the soil around the tuber has dried through. Restore the right moisture level, but don’t leave a soil-grown tuber standing in water. If the tissue is still firm, it may recover; if it is soft as well as shrivelled, inspect closely for decay.
Soft tissue or a sour smell: Treat that as a rot warning. In water, replace the water and check whether the submerged part of the tuber has become soft. In soil, lift the tuber carefully enough to inspect it. Remove decayed material and don’t keep a badly softened, foul-smelling tuber in the same wet setup. Adding more water would make the conditions that caused the problem worse.
Long, pale shoots: Check light before changing the watering routine. Move the container to a brighter spot, while keeping it warm and away from cold glass. A shoot that has already stretched may not become compact again, but better light can help the next growth come in stronger.
Here’s the check I’d make today: touch the tuber or the mix, confirm the spot is warm, and look for softness or an unpleasant smell. Make one adjustment that matches what you find, then inspect it again in a week. If the tuber is firm and the setup is warm, give it that week before deciding it has failed.
Frequently Asked Questions
Can I grow slips from a grocery-store sweet potato?
Often, yes, but sprout inhibitors, variety, and disease status are uncertain; disease-free planting stock is more dependable.
How many slips can one sweet potato produce?
There is no dependable fixed count; output varies with the tuber, warmth, and growing conditions, so avoid planning around a promised number.
Can I hold rooted slips if the weather is still too cold to plant?
Yes, for a short delay: keep them bright and warm with roots in clean water or moist mix, and check regularly for drying or decay.