Kratky Method Setup: Water Levels, Net Pots and Nutrients
A single lettuce plant is a sensible first Kratky crop, and about 3.8–7.6 L (1–2 US gal) of reservoir capacity is a practical place to start. The setup is deliberately simple: the plant sits above a still nutrient solution, and as the level falls, roots have access to both water and the air space above it.
That simplicity has a catch: you can’t treat the reservoir like a pot of soil and refill it to the brim whenever it looks low. Here’s how I’d choose the vessel, mix the solution and set the starting waterline so the system has room to work.
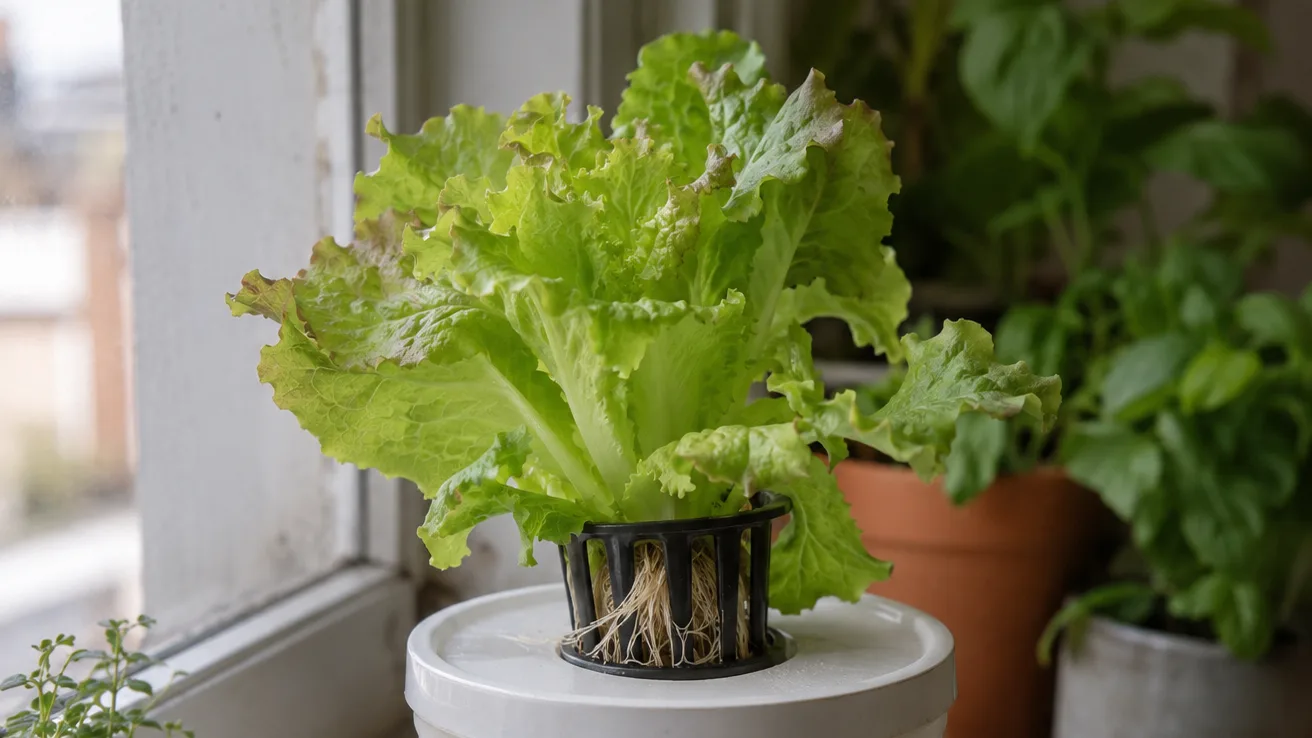
Start with a crop that suits a passive reservoir
The Kratky method is a non-circulating way to grow a plant with its roots in nutrient solution. There’s no pump to run. For a first attempt, I’d choose one compact lettuce plant or another leafy green with a relatively short growing cycle, rather than a large, long-season fruiting plant.
The reason is practical: a small leafy crop is easier to match to a finite reservoir. A fruiting plant such as a tomato or cucumber can keep growing, develop a larger canopy and continue drawing water over a longer period. It also needs sturdier support. That doesn’t make fruiting crops impossible in a passive system; it makes them a poor choice for learning the waterline with a small jar.
Think one plant per reservoir while you’re learning. A shared container can work, but several plants draw from the same supply, and their roots compete for space. If one gets much bigger than its neighbour, a single water level becomes harder to manage. For a first setup, a solo lettuce plant gives you a clearer read on what the solution and roots are doing.
If you’re still deciding what belongs in a small growing space, the plain-language guide to container gardening for beginners can help you choose a crop before you buy equipment.
Reservoir capacity: plan about 3.8–7.6 L (1–2 US gal) for one lettuce
For one lettuce, I’d plan around 3.8–7.6 L (1–2 US gal) of reservoir capacity as a starting range, not a promise that every plant will finish on one fill. A smaller plant harvested young may need less; a larger head, a longer grow, warm conditions or a breezy balcony can use the supply sooner. In a clear, sunny or hot spot, I’d favor the larger end and check the level more often.
| Crop type | Starting capacity approach | What changes the plan |
|---|---|---|
| One lettuce | About 3.8–7.6 L (1–2 US gal) | Head size, time to harvest, heat and wind |
| Baby leafy greens | A smaller reservoir may suit a short, young harvest | How many plants share the vessel and how long they stay |
| One compact herb | Size for the mature plant and expected time in the system | Canopy size and whether you keep harvesting new growth |
| Tomato or cucumber | Don’t use the lettuce range as the design target | Longer growth, greater water demand and plant support |
That table is a planning comparison, not a crop-by-crop guarantee. For a first build, I’d rather give a lettuce some reserve than choose a container that only works if every condition stays mild. The trade-off is weight: a litre of water adds roughly a kilogram before you count the vessel, lid and plant, so check the balcony or shelf’s limits rather than scaling up casually.
Measure usable solution volume, not the container’s advertised capacity. A vessel’s full volume includes the space up to its rim, but your starting solution needs to reach the bottom of the net pot or starter plug without spilling. Put the empty reservoir on a level surface, add water in measured amounts, and note the amount at the intended starting line. That’s the volume you can actually plan around. The guide to best container size for vegetables covers the same useful distinction between a pot’s nominal size and the room a crop can use.
Net pots, lids and light-blocking containers
The net pot has two jobs: hold the seedling and let its roots grow through into the reservoir. Common examples include 5 cm (2 in) and 7.5 cm (3 in) cups, but neither size is a universal crop rule. Match the cup to the seedling plug and the lid opening, then check that the rim rests securely instead of tipping through or wobbling on top.
A stable lid matters more than a fancy vessel. As the plant grows, a loose cup can shift, tilt the stem or expose the reservoir to more light. Use an opaque container, or cover a light-coloured vessel so light can’t reach the solution. Light in a nutrient reservoir encourages algae; a lid that fits well also helps keep debris out.
For a small setup, a food-storage container with a snug lid may seem convenient, but make sure the material is appropriate for repeated contact with your nutrient solution and edible crop. If you’re unsure about a plastic or coating, check its stated use rather than assuming every household container is suitable. The cup and lid should be clean, stable and easy to inspect.
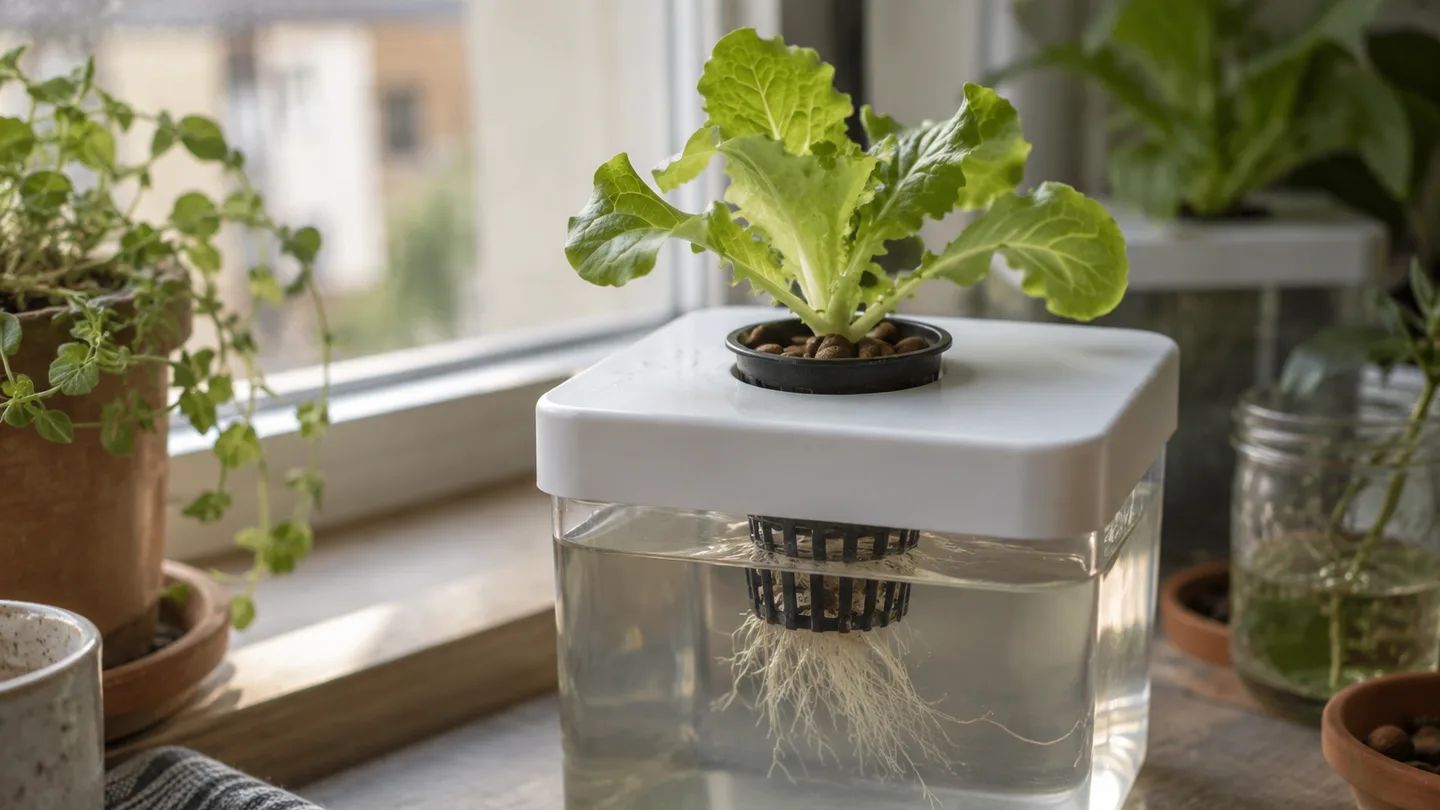
Mix nutrients by label, then check lettuce pH and EC
Use a complete hydroponic nutrient intended for edible plants, and follow the product’s dilution and mixing order. Different products may have separate parts that must be diluted one at a time; adding concentrated components together can cause them to react before they are dispersed. I’d mix each part into the water as directed, stir, and only then check the finished solution.
For lettuce, pH around 5.5–6.5 and EC around 1.2–1.8 mS/cm are useful working references, not instructions to overrule the label. EC, or electrical conductivity, is a meter reading used as an indication of how concentrated the dissolved nutrients are. Source water, crop stage and the nutrient formula can shift the useful target. Follow the product guidance first, and treat the ranges as a check that prompts a closer look rather than a reason to keep adding fertilizer.
Use meters according to their instructions, including any calibration or care steps they require. Check the mixed solution rather than guessing from how many drops went into the bucket. If the pH is outside the product’s guidance, correct it carefully and recheck; don’t pour in a large adjustment by eye. Likewise, if EC is already high, more nutrient is not the automatic fix for pale leaves.
For a refresher before buying a meter, the guide to hydroponic nutrient solution: pH and EC basics for beginners explains what those readings can and can’t tell you. You can also consult extension guidance on hydroponic lettuce pH and electrical conductivity for general context, then use the instructions for your specific nutrient product.
Move a seedling plug into the net cup when roots are ready
Start the seed in a small hydroponic starter plug or another clean, water-holding medium intended for seed starting. Move it when the seedling has true leaves—the leaves that appear after the first, simpler seed leaves—and roots have begun to hold the plug together. Let the plant’s development, not a fixed number of days, decide the timing.
Set the plug in the net cup so it is supported and its lower edge can reach the initial solution. If you use a loose support medium such as clay pebbles around the plug, keep it from falling through the basket. Don’t pack the cup so tightly that expanding roots have nowhere to pass.
Garden soil is a poor fit for this small reservoir. It can shed particles into the water, make the solution harder to keep clean and behave differently from a purpose-made hydroponic starter medium. If a seedling is very small and its roots haven’t reached beyond the plug, placing it too high above the solution can leave it dry; placing the cup too deep can keep the root zone saturated. Aim for contact at the plug’s base, not a submerged stem.
The starting waterline becomes the air gap
Once the nutrient solution is mixed, set the lid and net pot in place. Raise the initial waterline until the bottom of the cup or starter plug can touch the solution. That gives newly developing roots a route down to moisture. As the plant takes up water and the level drops, the space between the solution and lid becomes an air gap.
In this method, some roots remain in solution while others can grow through the humid space above it. The roots exposed to that space have access to air; the ones reaching the solution take up water and dissolved nutrients. The important distinction is that the whole root mass shouldn’t be left dry, but the established air-root zone shouldn’t be drowned by repeatedly filling the vessel back to its starting height.
Here’s a concrete setup to picture: one lettuce plug in a fitted net cup above an opaque 5 L (about 1.3 US gal) container. I’d first measure how much solution reaches the plug’s base while leaving room below the lid for the level to fall. The container’s full 5 L capacity isn’t automatically the amount to pour in. Mark the outside at the starting line, then watch where the solution sits as roots develop. The mark is a reference for that vessel, not a refill target.
For a visual explanation of the non-circulating approach, look for a clear Kratky method overview and compare its root-zone illustration with your own cup and reservoir. In practice, the useful check is simple: at setup, can the plug reach moisture, and later, is the solution still below the net pot?
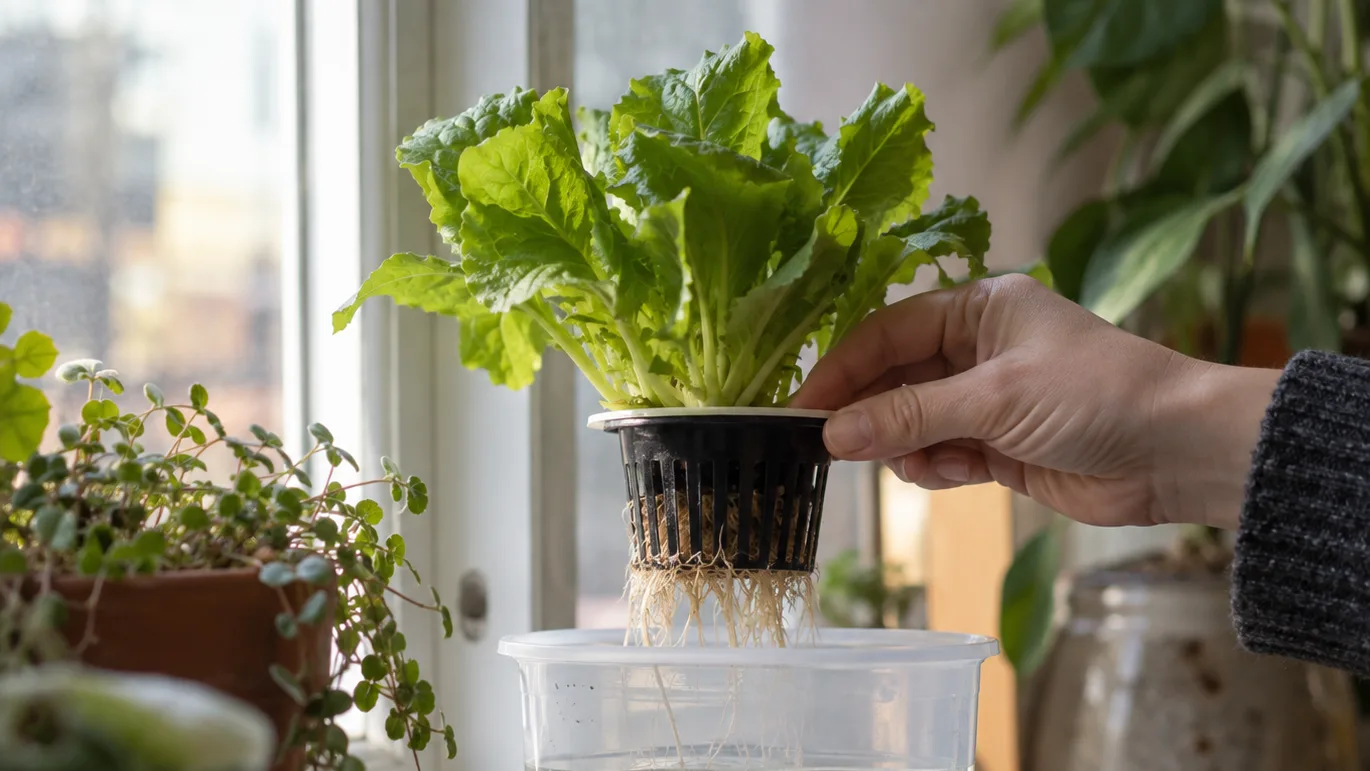
Light and temperature set the pace of water use
Indoors, I’d use 12–16 hours of grow light as a working schedule for leafy greens, adjusting for the lamp and the plant’s response. It’s a starting point, not a timer setting that overrides the light manufacturer’s instructions or the crop’s condition. If leaves stretch toward the lamp, the light may be too weak or too far away; if they bleach or look scorched, check intensity, distance and heat before extending the schedule.
A temperature around 18–24°C (65–75°F) is a useful working range for a leafy-green setup. Warm conditions can speed water use, and direct balcony sun can heat a dark reservoir even when the leaves seem comfortable. I’d keep the reservoir out of harsh direct sun while giving the leaves the light they need. A simple shade around the container can help without covering the plant.
Wind matters too. On an exposed balcony, moving air can dry foliage and the surrounding space faster than in a sheltered indoor corner. Don’t respond by automatically adding more nutrient. Check the water level and solution readings first, and move or shade the vessel if it is getting hot.
Refill only if the crop outlasts its original solution
A short lettuce run may finish on its original fill, especially when the reservoir was sized with some margin and the growing conditions stay moderate. A longer-lived plant may use the solution before it is ready to harvest. There isn’t a reliable calendar that fits every vessel, so inspect the level and the plant instead of refilling on a fixed weekly schedule.
If you do replenish, keep the new solution below the net pot and the established air-root zone. Bringing the liquid back to the original high line can submerge roots that had been exposed to air. Add only enough to maintain access to solution for the submerged roots, and leave the air gap intact. If the reservoir is nearly empty, the plant is struggling, or you’re unsure what remains in the solution, replacing it with freshly mixed nutrient solution may be a clearer reset than repeatedly topping up by guesswork.
Before adding anything, check whether the container is actually low, whether it has a leak and whether the plant looks heat-stressed. A falling line can be normal water use; a sudden drop deserves a look at the vessel and conditions. Keep a note of the date and approximate level if you want to learn how quickly your own balcony setup changes. Your observations are more useful than a generic refill calendar.
Reading algae, brown roots and pale leaves as setup clues
Green solution or slippery green growth: check for light getting through the reservoir wall, lid gap or net-pot opening. Cover the leak with an opaque material and clean the vessel before restarting. Adding fertilizer won’t block the light that algae need.
Roots that look brown or feel slimy: don’t diagnose from colour alone. Some staining can come from the nutrient solution or growing medium, while sliminess, a sour smell or a collapsing plant calls for a closer check. Inspect whether the solution has become contaminated, whether the root zone is staying submerged above the intended level, and whether the container is clean. Remove badly degraded plant material and reset with a clean reservoir if the solution itself is suspect.
Pale, yellowing or scorched leaves: check the waterline, temperature and meter readings before increasing fertilizer. A reading outside the product’s guidance can point toward a solution problem; a heat-stressed plant or damaged roots can also struggle to take up nutrients. Make one correction at a time and watch the new growth, rather than changing pH, nutrient strength and light all at once.
I’d troubleshoot in that order: block light leaks, confirm the waterline, inspect the roots, then check pH and EC. It keeps a visible symptom from sending you straight to the fertilizer bottle when the actual problem may be a hot, exposed reservoir.
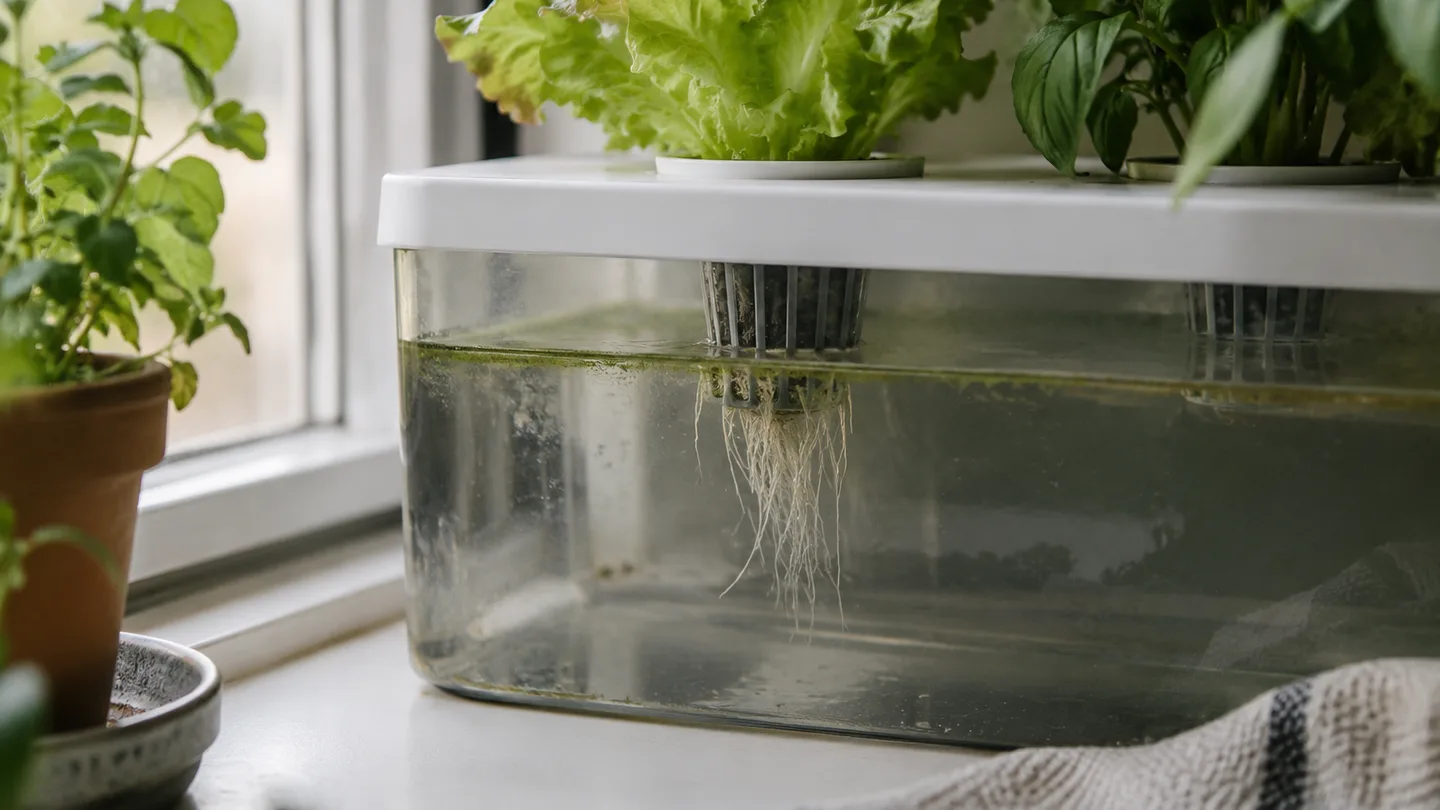
Harvest, empty and reset the reservoir
Harvest lettuce when it has reached the size you want and the leaves look sound; the timing depends on variety and growing conditions. Don’t wait for a perfect calendar date. If the plant is bolting, declining or no longer worth keeping, harvest what remains usable and clear the container.
Discard spent solution responsibly rather than pouring concentrated nutrient mix where it can run into a storm drain or waterway. Follow local disposal guidance, especially if you have mixed in anything beyond the product’s standard nutrients. Wash the reservoir, lid and net cup, remove residue, and let them dry before the next setup. Don’t assume rinsing alone removed every film from a reused vessel.
Before restarting, check for cracks, loose lid openings, light leaks and nutrient residue. Then prepare a fresh solution according to its label and mark the starting waterline again. This week, set your empty reservoir on its intended balcony or shelf, check that it sits level, and measure the usable volume up to the plug’s contact point before you buy the net cup.