Saving Tomato Seeds: Ferment Them First for Better Storage
Saving tomato seeds is not a matter of scraping them onto a plate and hoping for the best. Give the pulp 48–96 hours to ferment at warm room temperature, then rinse and dry the seeds for 7–14 days before storage; that sequence is the practical difference between a clean packet and a sticky one that ages badly.
Fermentation doesn't make weak seed strong. It loosens the slippery coating around the seed so I can rinse away pulp and dry the seeds evenly before moisture gets trapped in the packet.
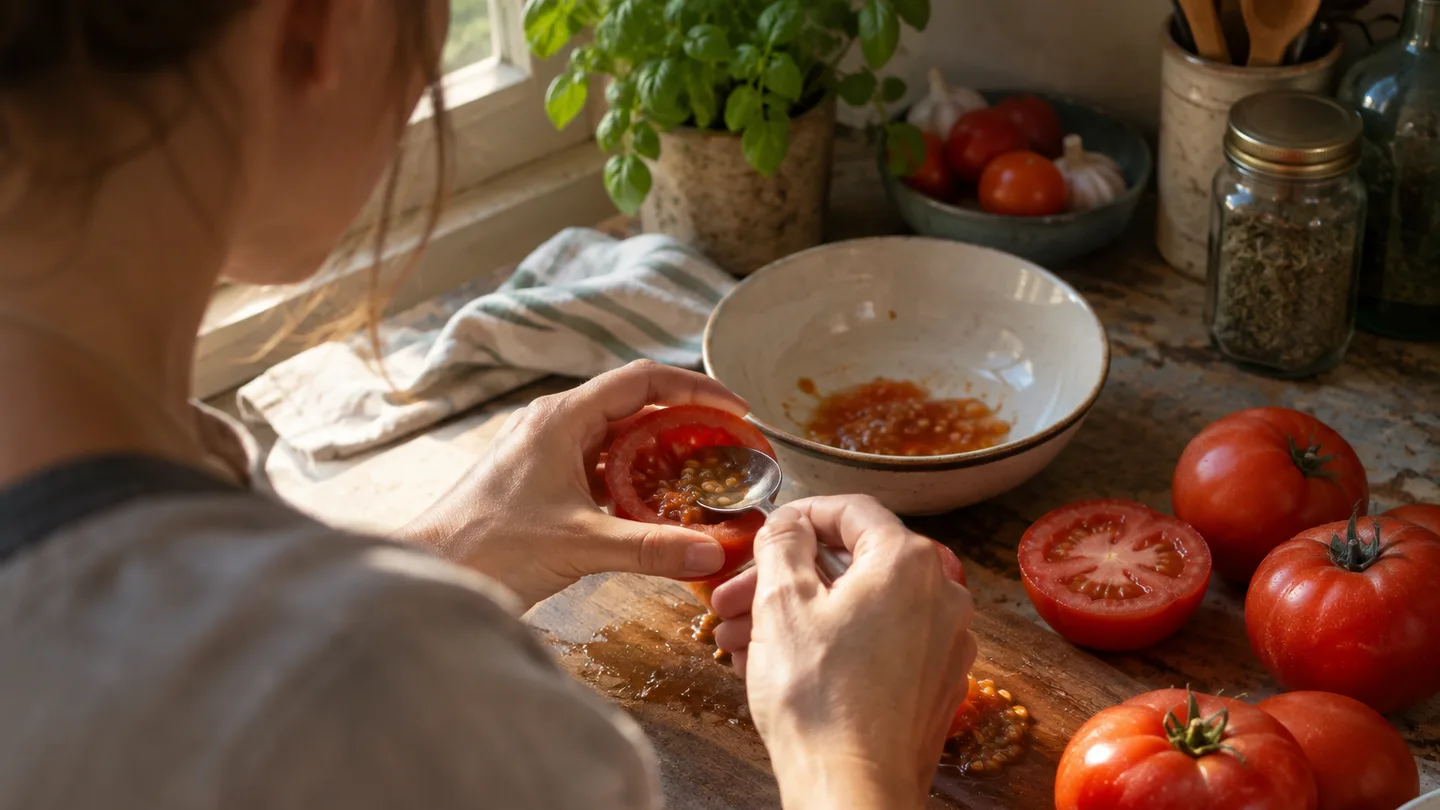
Start with the right fruit: ripe, healthy, and worth reproducing
I start with a tomato I would actually want to grow again. Choose fruit that is fully coloured for its variety, beginning to soften, and free from active rot or suspicious disease symptoms on the plant. A green tomato that has merely reached an edible size is not the same starting point as one that has finished ripening and allowed its seeds to mature inside.
If I have several fruits from the same plant, I prefer saving from two or three rather than treating one tomato as the whole sample. That gives me more seed to choose from and reduces the chance that one poorly filled, damaged, or partly immature fruit decides the quality of the packet. It is still a small household batch, not a breeding programme.
Open-pollinated varieties are my first choice when I want the next generation to resemble the parent. That does not mean every seedling will be identical: nearby tomato varieties can contribute pollen, and natural variation still exists. It means the variety has not been deliberately created from a one-off cross in the way a hybrid has.
Heirloom describes a history or lineage more than it guarantees a particular level of purity. Many heirlooms are open-pollinated and excellent candidates for seed saving, but I still label the packet with the exact variety and the plant it came from. Hybrid seed comes from a deliberate cross between selected parent lines, so seed saved from the resulting fruit can recombine those traits. The new plants may differ in fruit size, colour, maturity, disease response, or growth habit.
Supermarket tomatoes aren't automatically useless for seed saving, but they are less traceable. The variety may be unknown, the fruit may have been chosen for transport rather than flavour, and a hybrid parent may not be obvious from the label. I treat supermarket seed as an experiment, not as a dependable way to preserve a known cultivar.
I don't save from a plant showing active rot, badly diseased foliage, or fruit lesions that make me question the whole plant. On my own balcony, I once cut open a tomato that looked ready from across the railing but was still firm at the shoulder. I saved the seeds anyway, spread them on a plate, and ended up with a stubborn smear of pulp around several seeds. The lesson was not that fermentation failed; I had started with fruit that needed more time on the kitchen counter. Now I wait until the colour has settled across the fruit and the texture has softened before I process it.
Whether you grow a compact plant or a long-vining one, the seed-saving steps are the same; determinate vs indeterminate tomatoes matters more for space, support, and harvest timing than for the fermentation jar. If you're planning next season's small-space list, the broader guide Easy fruits and vegetables to grow in pots can help you decide which crops deserve a labelled packet.
The 48–96-hour fermentation window: what the gel coating is doing
Fermentation is not a ritual to make seeds powerful; it is a cleaning stage. Inside a ripe tomato, each seed sits in a slick gel that helps it stay embedded in the fruit. Once you scoop the pulp into a jar, that gel can dry into a gluey film, hold bits of tomato against the seed, and make the batch dry unevenly.
During a short, warm fermentation, microbes break down much of that gel and loosen the surrounding pulp. The useful result is a seed that can be rinsed more cleanly and spread apart for drying. I care about that physical change because storage problems often begin with a small lump of wet pulp hidden between seeds, not with the seed itself.
I work in a warm range of 20–27°C (68–80°F) and use 48–96 hours as the working window. In a cooler room, the jar may still look almost unchanged at the two-day mark, so I inspect it rather than throwing it out. In a warm room, I check earlier because the pulp can move from loose and easy to rinse into strong-smelling and messy if it is forgotten.
At about 48 hours, inspect the jar. The liquid may be cloudy, the pulp may have separated, and many sound seeds will have settled, although I don't use floating alone as a discard rule. A few bubbles or a thin surface film can occur during active fermentation. Fuzzy coloured growth, a putrid odour, or an obviously contaminated jar is a different matter; I would discard that batch rather than trying to rescue it for food crops.
I don't treat fermentation as sterilisation. It can improve the cleanliness of the seed surface, but it is not a guarantee that every disease organism has been removed, and it cannot repair seed that was immature or already damaged. I use general guidance on tomato seed fermentation as a cross-check, but the jar itself tells me when the pulp has loosened enough to rinse.
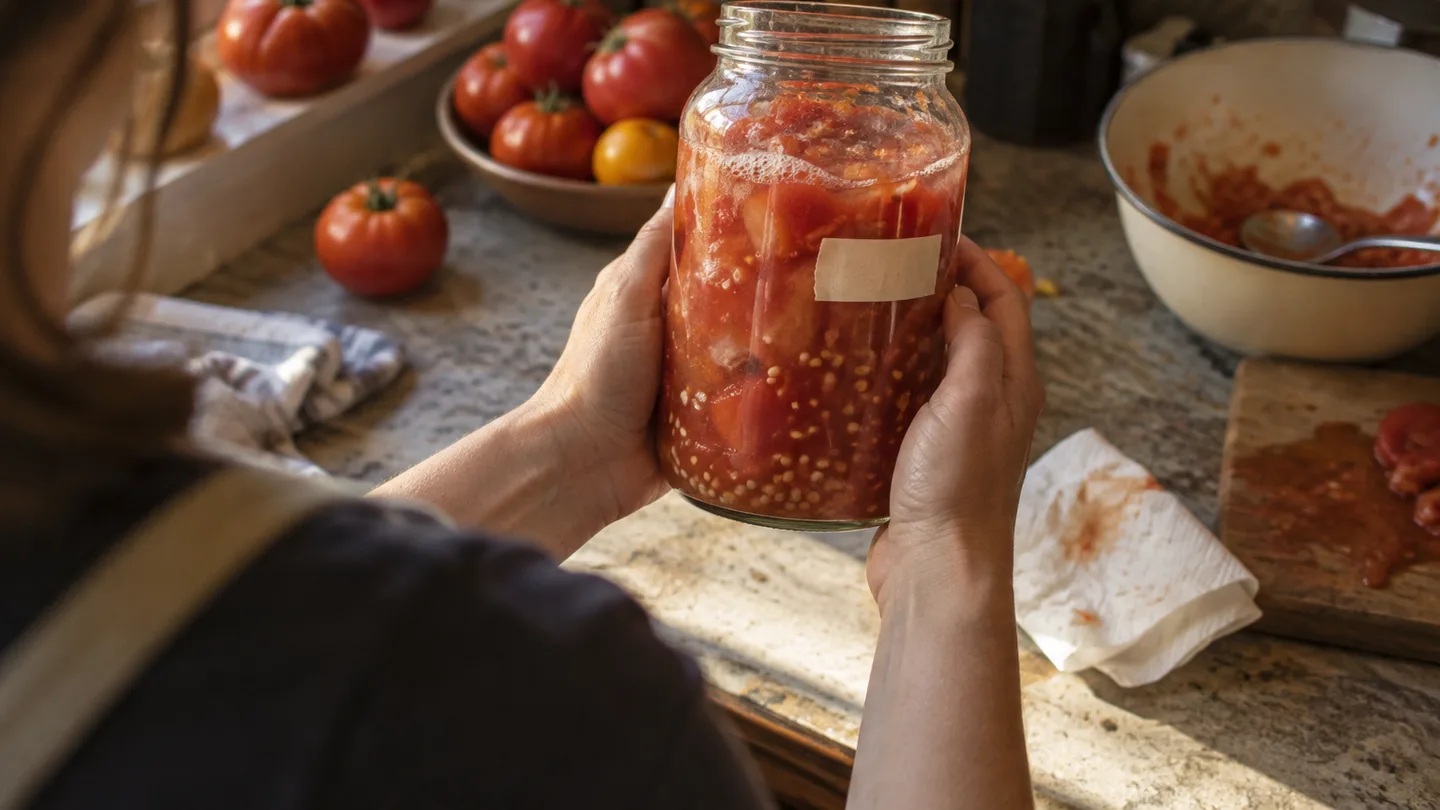
Jar to sieve: the no-guesswork fermentation sequence
The method is simple, but the order matters. Label first, add as little water as practical, keep the jar warm but not sealed tight, and rinse as soon as the pulp has released. That sequence gives you useful control over a process that otherwise turns into a forgotten jar on a windowsill.
- Label the container before you open the fruit. Write the variety, the source plant if you know it, and the harvest date or year. A jar of anonymous tomato pulp is easy to misidentify once several varieties are on the counter.
- Squeeze the seed-filled gel into a small jar. Cut the tomato across the middle and use your fingers or a spoon to move the seed pulp into the container. There is no benefit to scraping every last piece of flesh into the jar; the seed-bearing gel is the part you need.
- Add only enough water to make the pulp movable. If the tomato is juicy, add none. If the pulp is unusually dry, add a small splash so the seeds are covered and can be stirred. The aim is a loose slurry, not a jar full of diluted red water.
- Leave roughly one-third of the jar empty. Cover it loosely with a lid resting on top, a lightly fitted cap, or a breathable cover that keeps insects out. I don't screw the lid down hard. Some headspace makes stirring easier and gives the active pulp room without forcing liquid against the seal.
- Keep the jar at warm room temperature and check it around 48 hours. Put it somewhere out of direct sun where the temperature is reasonably steady. A windowsill that heats sharply in the afternoon is less useful than a warm shelf indoors.
- Stir once a day with a clean spoon. The stir breaks up a cap of floating pulp and exposes more of the seed-bearing material to the same conditions. I keep the movement gentle; the goal is even contact, not aggressive scrubbing.
- Rinse when the coating has loosened. Pour the contents into a fine sieve and wash with cool running water. Rub the seeds lightly against the sieve or with clean fingers until most of the slippery residue is gone, then move straight to the drying stage.
Too much added water dilutes the pulp and gives you more liquid to decant without improving the cleaning job. It can also make the seeds harder to see and separate. A tightly sealed jar creates a different avoidable problem: pressure can build, the lid can leak, and opening it may send fermented pulp across the counter.
If the batch is not ready at 48 hours, I check it again at roughly 72 hours and then at 96 hours. I would rather rinse slightly early and deal with a little remaining pulp than leave a small home batch unattended for several extra days.
Drying is the storage step most people rush
Once the seeds have been rinsed, drying becomes the storage step most people rush. Spread them in a single layer on a labelled non-stick surface: a glazed plate, smooth plastic lid, silicone sheet, or another surface from which dry seeds can be lifted without tearing them away from fibres.
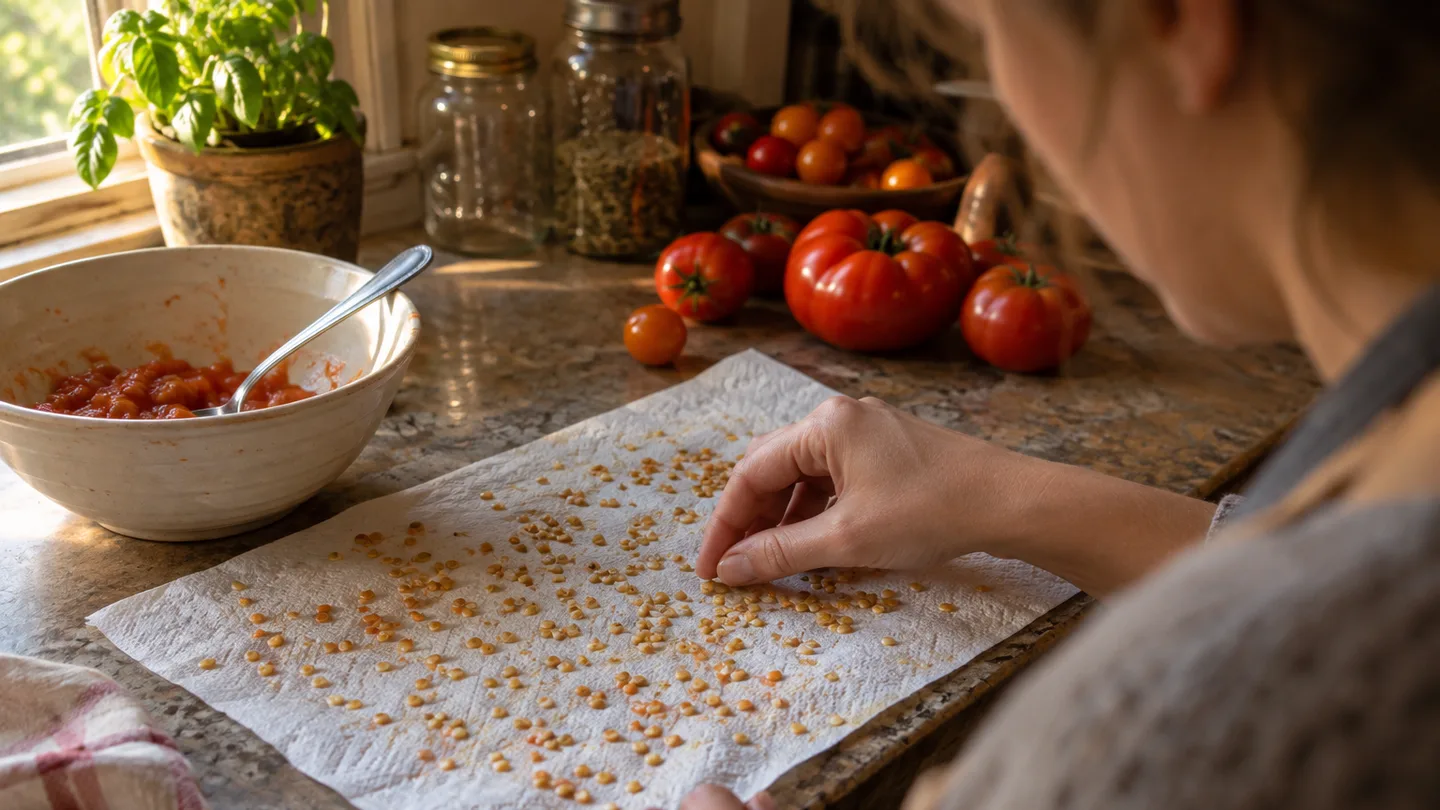
Give the spread seeds roughly 7–14 days in a dry, airy room, checking them rather than obeying the calendar blindly. In a humid home, the longer end of that range may be sensible. Stir or separate clumps gently after the first day or two, when the outer surface is no longer glossy but the seeds have not yet become firmly attached.
Dry seeds feel hard, separate from one another, and stop leaving a tacky smear when moved. Seeds that still feel cool and flexible, bend slightly under light pressure, or remain stuck in wet clusters are not ready for an airtight container. The outside can look dry while the centre of a clump still holds moisture.
I avoid paper towels because the fibres can grip the drying pulp and make the final harvest a picking job. I also avoid direct high heat from a radiator, oven, or strong dehydrator setting. Uneven heat can damage seed while leaving the moisture problem unsolved in thicker clumps. A normal dry room takes longer, but it is easier to inspect.
For the drying part, seed-bank advice on drying and moisture control is the useful reference point: storage begins with removing excess moisture, not with buying the most impressive container. If the seeds are still clumping, the answer is more drying time, not a tighter lid.
Build a storage package that keeps moisture out
My default package is a labelled paper envelope inside an airtight container. The envelope keeps the seeds together and gives me a place to write the variety, source plant, harvest year, and any note that will matter next spring, such as “late but tasty” or “small fruit.” The outer container provides the more useful barrier against humid air.
A desiccant packet is a backup, not a substitute for proper drying. I use one only when the seeds are already hard and free-flowing, and I keep the packet separate from the seed rather than mixing it through the envelope. Desiccant can take up stray moisture inside a sealed container; it cannot reliably reverse seeds that went into storage damp.
A cool, dark cupboard works when the air is dry and the temperature stays fairly stable. For storage across more than one season, I prefer a stable refrigerator at around 4°C (40°F), provided the seeds are sealed before they go in. The point of cooling is to slow moisture-driven ageing, not to expose the packet to repeated warm-and-cold swings.
If I refrigerate seed, I put the packet inside a second sealed container and keep it away from the door, where temperature changes are more likely. Let the sealed container return to room temperature before opening it. That order matters because warm, humid room air can condense on cold seeds and put moisture back into the packet just when you are trying to plant them.
Freezing is reasonable only for seed that is thoroughly dry and protected in a genuinely moisture-tight package. I would use small packets so I do not repeatedly thaw the entire supply. A single cupboard or refrigerator is usually simpler for a balcony gardener who expects to sow the seed within the next few seasons.
Even well-prepared seed doesn't stay equally vigorous forever. Treat a saved packet as a living supply whose germination may decline over several years, not as an heirloom vault with an unlimited shelf life. Write the year on the envelope so an older packet does not quietly become the only plan for a new season.
Troubleshooting by symptom: mold, smell, and poor germination
When I troubleshoot, I start with where the seed is in the process rather than judging the jar by smell alone. The table below is the order I would use on a small household batch.
| What you see | Likely cause | What I would do |
|---|---|---|
| No visible breakdown after 48 hours | The room may be cool, the pulp may be too dry, or the mixture may be mostly water. | Move it to a steadier warm room, stir, and inspect again before extending the batch toward 72 hours. |
| Thin film or a few bubbles | Active fermentation at the surface. | Check for the difference between a smooth film and fuzzy coloured growth; rinse if the pulp has loosened. |
| Strong rotten smell or visible fuzzy growth | The batch is contaminated or has been left too long. | Discard it rather than storing questionable seed with good seed. |
| Seeds left in the jar beyond 96 hours | The pulp may be over-fermenting and becoming harder to handle. | Rinse immediately if the seeds still look sound; do not keep extending the process to chase a cleaner result. |
| Seeds stuck to the drying surface | They were still wet, or the surface was too absorbent. | Let them dry completely, then flex the smooth surface or lift them gently instead of pulling while tacky. |
| Soft, dark, or collapsed seeds | Immaturity, rot, or physical damage. | Separate them from firm, pale seeds and do not make the questionable portion your planting plan. |
| Weak germination after storage | Age, residual moisture, poor initial seed development, or a poor test environment. | Run a small germination check before sowing the full packet. |
A thin, smooth film or a few bubbles can be part of active fermentation, while fuzzy coloured growth or a putrid smell is a discard signal. If the jar has gone past 96 hours, I stop trying to improve it by waiting and move to the sieve. The longer the pulp remains wet, the more likely it is to become unpleasant to separate from the seed.
Seeds that stick hard to the drying surface usually need more time, not more force. Soft, dark, or collapsed seeds are a different category: I remove them and keep them away from the firm seeds I intend to store.
Once the batch is dry, I use a small germination check before trusting it with the whole planting.
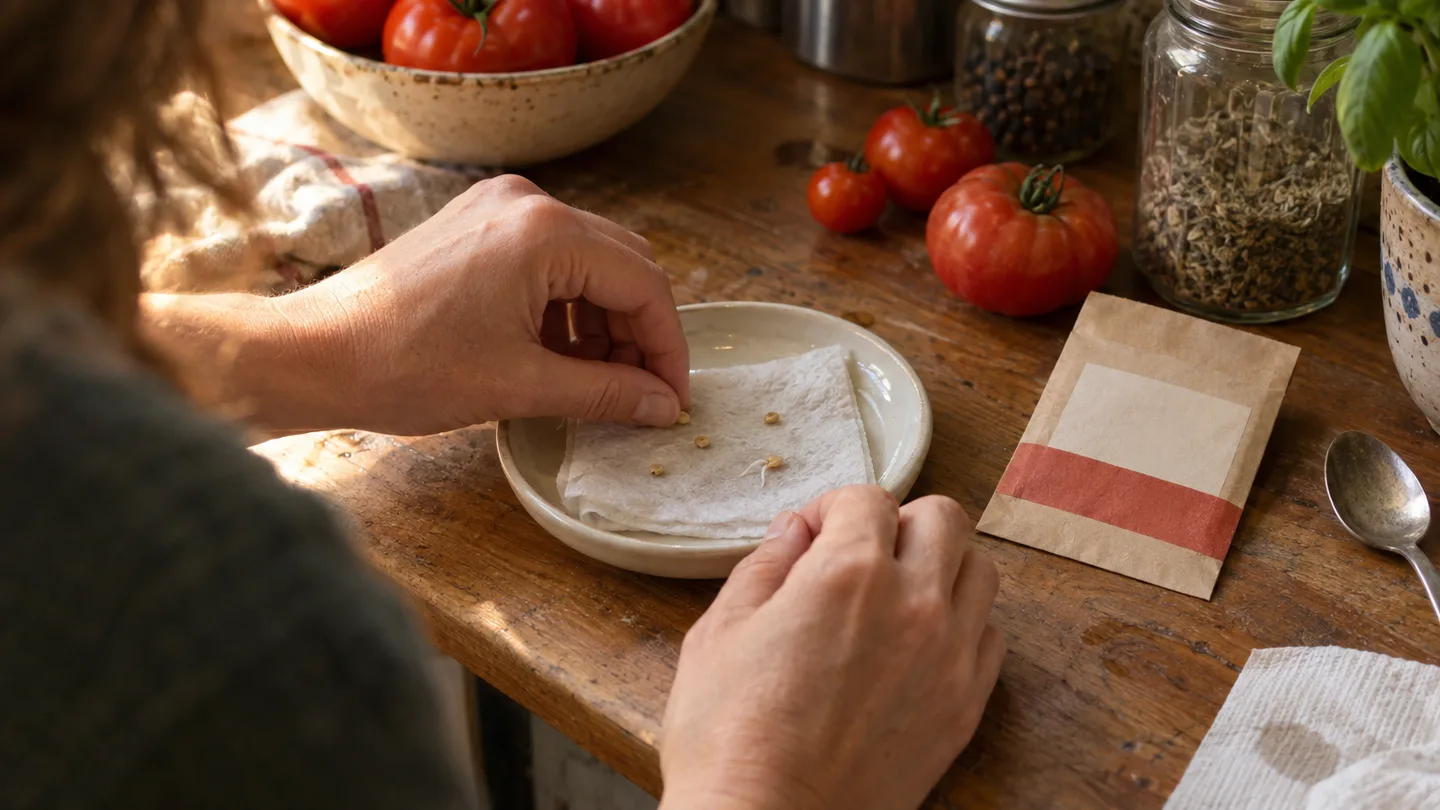
Place ten seeds in a damp paper towel. Fold the towel, put it in a loosely closed bag or container, and keep it warm but out of direct sun. Check at about day 7 and again at day 14.
If only one or two of ten germinate, I would sow extra seed if I had it and avoid making that packet my entire season's plan. Ten seeds give me a readable warning without using a large share of a small packet, but the test is still a sample, not a guarantee about every seed.
That ten-seed check can show whether the stored batch is capable of germinating under those simple conditions; it cannot prove that the seedlings will match the parent, resist every disease, or produce a particular harvest. A seedling that later loses flowers is also not automatically a storage failure; blossom drop tomatoes is a separate problem to diagnose after germination.
Before you put the packet away, write the variety, source plant, harvest year, and one honest note about the fruit. Your next physical action is simple: set one ripe, healthy tomato aside, label the jar before you cut it, and put a reminder on your calendar for the 48-hour check.