Growing Dill in Pots: Pot Size, Watering and Harvest Tips
For one dill plant, I’d buy a container 25–30 cm deep (10–12 in) and plan on roughly 8–12 litres (2–3 gal) of potting mix; 20 cm (8 in) is the workable floor. That size won’t stop bolting in a heatwave, but it gives the roots and soil enough room to make watering less frantic.
Dill looks like an easy windowsill herb, but its long root, quick growth and tendency to flower in hot weather make the container specification matter. I’ll walk you through the pot, direct sowing, moisture checks, light, feeding and the three useful harvest windows.
If you’re growing several herbs together, the same root-volume and drainage logic applies in growing herbs in containers: choose the pot around the plant’s mature shape, not the size of the seedling in your hand.
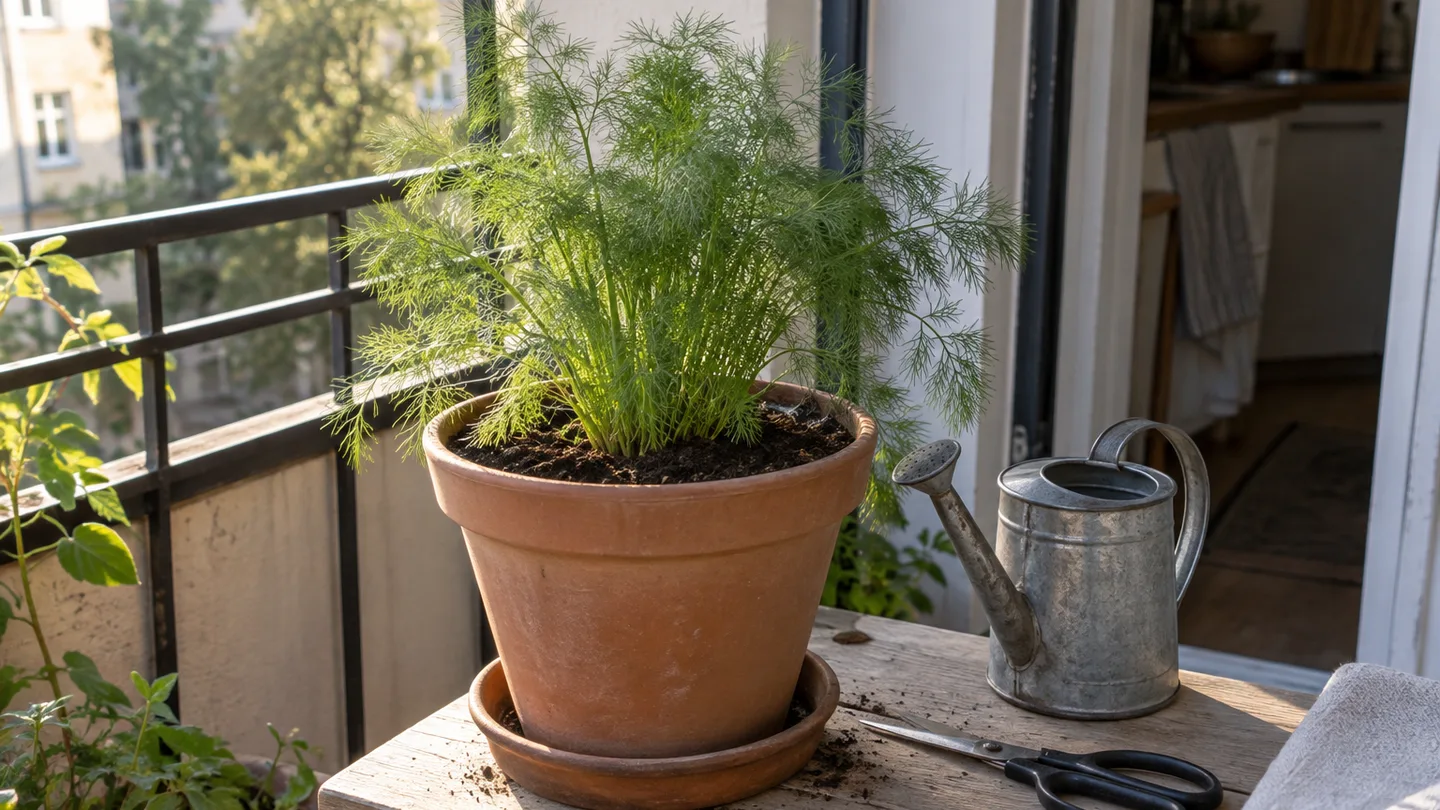
1. The pot I’d buy: 25–30 cm deep and roughly 8–12 litres of mix
The 20 cm depth is a minimum I’d use for one dill plant, not my preferred target. A 25–30 cm deep pot gives the root system more room and, just as usefully on a balcony, gives you a larger reservoir of mix that dries more slowly than a tiny herb container.
Here’s the shopping specification I’d use:
| Container choice | Best use | My judgement |
|---|---|---|
| At least 20 cm / 8 in deep | One compact dill plant | Usable minimum, but less forgiving in heat and wind |
| 25–30 cm / 10–12 in deep, about 8–12 L / 2–3 gal | One plant for regular home use | Best all-round target for a balcony or patio |
| 30 cm or more wide | Two plants with final spacing of 15–20 cm / 6–8 in | More stable, but check the filled weight |
| Tall narrow pot | Meeting depth where floor space is limited | Acceptable only if the pot is heavy and sheltered from strong wind |
Compact Fernleaf-type dill is the easier match for a pot because its foliage stays relatively restrained. Taller Bouquet or Mammoth types can still grow in containers, but their height creates a different problem: the top growth catches wind, and a narrow pot can wobble or tip before the roots run out of room. For those varieties, I’d favour a wider base, a heavier material or a position against a wall.
The spacing number matters more than the label. If two plants will finish 15–20 cm apart, don’t sow four seedlings into a 15 cm-wide container and hope thinning will solve it later. The roots may cope briefly, but the foliage will crowd, the mix will dry unevenly and harvesting one plant will disturb the others.
A little volume maths helps when you’re standing in the garden-centre aisle. A truly cylindrical pot 25 cm across and 20 cm deep holds about 9.8 litres before allowing for tapered sides, drainage space and the gap you leave below the rim. A real tapered planter will hold less than that calculation suggests. That’s why I look for the stated litre capacity where it’s available rather than trusting the outside diameter alone.
The wider pot matters less because dill is unusually greedy for root space than because a bigger soil volume buys you time between mistakes. If you forget one watering on a breezy afternoon, 10 litres of mix gives the plant more reserve than a shallow 3-litre pot.
Use a container with several drainage holes. Water needs to pass through the mix and out of the base; the holes are not there to make the pot drain instantly, but to give excess water somewhere to go. Empty a saucer after watering so the pot is not sitting in a permanent puddle.
Skip the gravel layer at the bottom. Gravel does not create extra root space. When fine potting mix sits above a coarse layer, the mix can hold a saturated band above that boundary before water moves through; this is the perched water table, meaning a temporary wet zone suspended above the bottom layer. Fill the container with potting mix instead and let the drainage holes do their job.
Material changes the watering interval. A plastic pot generally loses less moisture through its walls than unglazed terracotta, while a glazed ceramic pot usually gives you more weight and a slower-drying surface than porous terracotta. On an exposed balcony, I’d choose the stable pot first and fine-tune watering second. A large container full of wet mix is heavy, so check your building’s balcony guidance before clustering several of them together.
I’ve stopped treating a container labelled herb pot as a specification. When I’m choosing a dill pot, I check the inside depth, look for unobstructed holes and lift the empty container to judge whether it will still feel stable once it is filled. That three-minute check has more value than buying a pretty pot and trying to compensate with gravel or a rigid watering schedule.
2. Sow dill in its final pot—its taproot dislikes being moved
Dill is best treated as a direct-sown crop. Its long central root can be disturbed during transplanting, and a seedling that looks sturdy above the mix may still have a fragile root system below it. If you already have a small nursery plant, move it while young, keep the root ball intact and expect more setback than you would with a forgiving herb such as mint. For a fresh packet of seed, direct sowing is simpler.
- Fill the pot first. Use a quality potting mix, stop about two fingers below the rim and water it thoroughly so the mix is evenly damp before the seed goes in.
- Make shallow sowing spots. Place two or three seeds at each intended plant position, or make a thin line of seed, at 0.5–1 cm deep (¼–⅜ in). Dill seed does not need a deep cover.
- Cover lightly and water gently. Brush mix over the seed, then use a fine rose or gentle stream so the seed is not washed into a corner. Label the pot with the sowing date.
- Thin without tugging. Once seedlings are about 5–8 cm tall (2–3 in), keep the strongest plant at each position. Snip the extras at mix level rather than pulling them hard beside the seedling you want to keep.
Under suitable moisture, temperature and light, emergence commonly falls in the 7–14 day range. The range is a planning guide, not a guarantee: cool mix, buried seed, a drying surface or old seed can push germination later. If nothing has appeared by day 14, check the sowing depth and moisture before flooding the pot again.
Once the seedlings are thinned, aim for 15–20 cm (6–8 in) between plants. In a narrow window box, one plant may be the sensible answer. In a broad 30 cm container, two can work if each has its own space and the pot is not placed where wind constantly rocks the stems.
For a longer leaf harvest, sow another pot every 2–3 weeks while conditions remain suitable. This is more reliable than packing extra seeds around a mature plant. Each sowing gets a fresh period of leafy growth, so you can harvest the older pot, allow it to flower for useful umbels or seed, and still have younger leaves coming behind it.
If you want a second reference point, compare the method with horticultural extension guidance on dill sowing depth, spacing and transplant sensitivity, especially if your local summer is much cooler or hotter than the conditions described here.
3. Water by the top 2.5 cm, not by the calendar
The watering rule I use is simple: check the top 2.5 cm (1 in) of mix with a finger, then decide. If that layer still feels cool and damp, wait and check again later. If it feels dry, water thoroughly rather than giving the plant a token splash.
- Push your finger into the mix near the edge of the pot, not directly beside the stem.
- If the top layer is dry, pour slowly across the surface so the whole root zone receives water.
- Continue until a little water drains from the holes. That tells you the lower mix has been wetted, not just the surface.
- Empty the saucer after the pot has finished draining.
A potting mix that has become extremely dry can pull away from the pot wall. Water may then run down the sides and out of the holes without soaking the middle. If the mix remains dry below the surface, water more slowly, pause for a few minutes and repeat. The goal is a damp root zone, not a quick wet line around the outside.
There is no useful single answer to how often dill needs water. A small plastic pot in full sun may need a daily check during hot, windy weather. A larger glazed pot in part shade may go two or three days between checks. Those are checking intervals, not promises that the plant should be watered on those exact days.
As the plant grows, the foliage can shade the surface while the roots continue using moisture below. Wind also increases water loss even when the air temperature does not feel extreme. That is why I check the mix rather than relying on yesterday’s weather or a calendar reminder.
When dill looks limp, start by touching the mix. Limp leaves with a dry root zone point first toward underwatering. Limp or yellowing leaves with persistently wet mix point toward poor drainage or roots short of air. Yellow leaves can have other causes, including age or feeding problems, but the moisture check tells you which branch to investigate first.
The same top-layer check is useful in growing basil in pots, but basil’s broad leaves can wilt dramatically in a short time. Dill often gives you a little more visual warning through soft stems and a duller, less upright canopy. Don’t wait for a full collapse before checking.
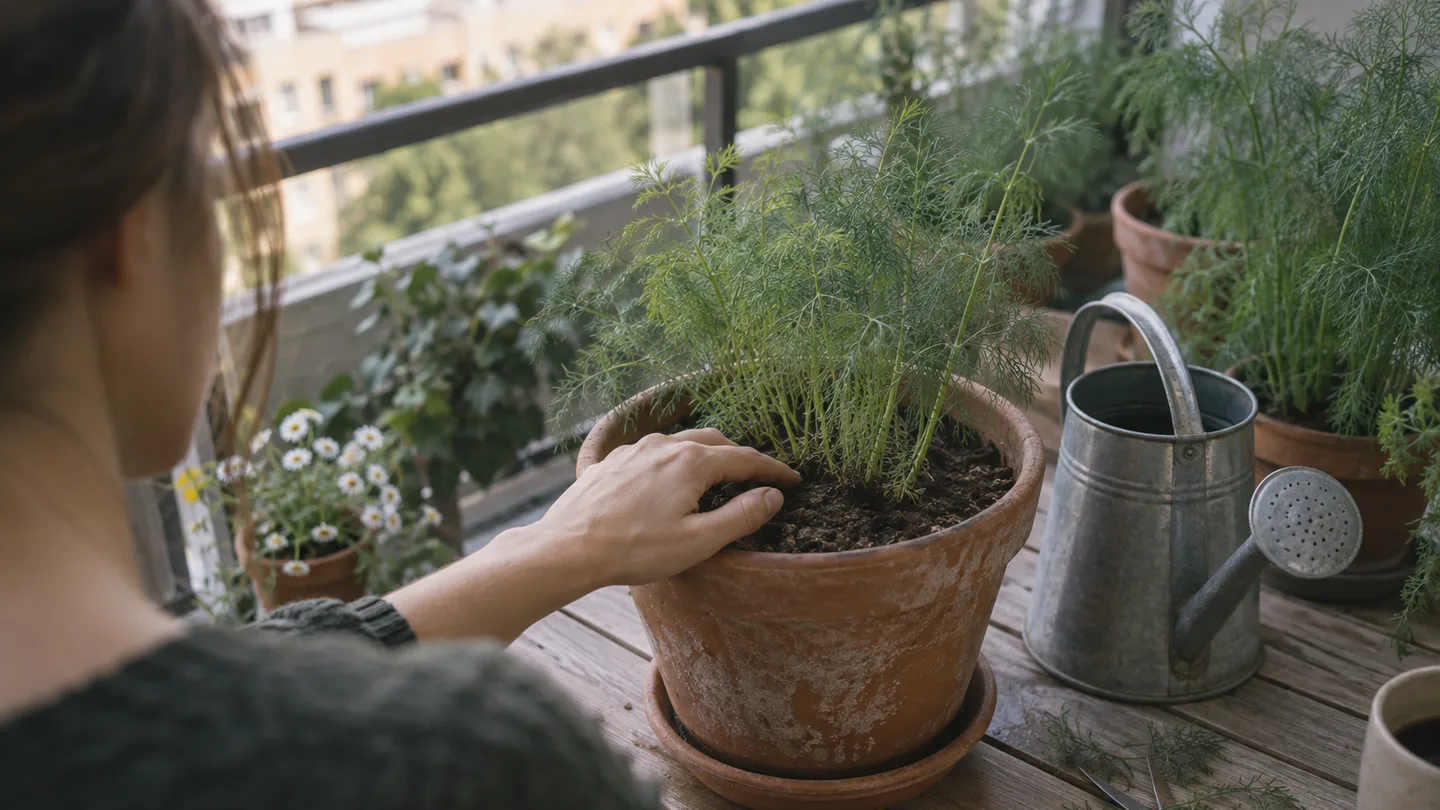
4. When summer turns the pot into a bolt machine
Dill needs useful direct light to make compact leafy growth. About six hours of direct sun is a practical target. Four to six hours can still produce a harvest, though the plant may be thinner. With only one or two hours of usable sun, I’d expect stretched stems, sparse foliage and a flower stalk arriving before the plant has made much bulk.
Bolting means the plant shifts from leaf-making to producing a flower stalk. Heat, drying out, root restriction, crowding and the plant’s age can all move it in that direction. Low light does not always prevent bolting; it can give you a tall, weak plant that flowers without ever producing the dense foliage you wanted.
When several days are forecast near 30°C (86°F), change the setup rather than trying to force the pot through the hottest part of the day. Move it into morning sun and afternoon shade, keep the moisture more even and avoid placing dark plastic against a heat-reflecting wall. Morning watering is useful because it replenishes the root zone before the day’s evaporation begins, but the mix still decides whether water is needed.
A heatwave is also the point where I resow instead of trying to keep one mature plant permanently leafy. Pinching off a flower stalk may buy a little time, but it does not turn an ageing dill plant back into a young one. Harvest what is usable, let a plant flower if you want umbels or seed, and start another pot when conditions settle.
Feeding depends on what is already in the mix. In a fresh, pre-fed potting mix, I’d usually wait 3–4 weeks before feeding. After that, use a balanced liquid fertiliser at half the label strength every 3–4 weeks, unless the product directions specifically say otherwise. Water the plant first if the mix is dry, then apply the feed to a moist root zone.
Heavy nitrogen is not a shortcut to better dill. It can push soft, floppy growth that needs more water and catches more wind. My preference is a moderately fed plant with sturdy stems over a dark-green, oversized plant that collapses when the pot dries for half a day.
If you are deciding whether to move the pot before a hot spell, regional frost-date and heatwave guidance can help you judge the local timing for sowing, shade and the end of the season. The container still needs a moisture check on the balcony; a regional forecast cannot tell you how quickly your particular pot is drying.
5. Harvest leaves before the umbels, then choose flowers or seed
Dill gives you three useful harvest windows, and each one calls for a different decision.
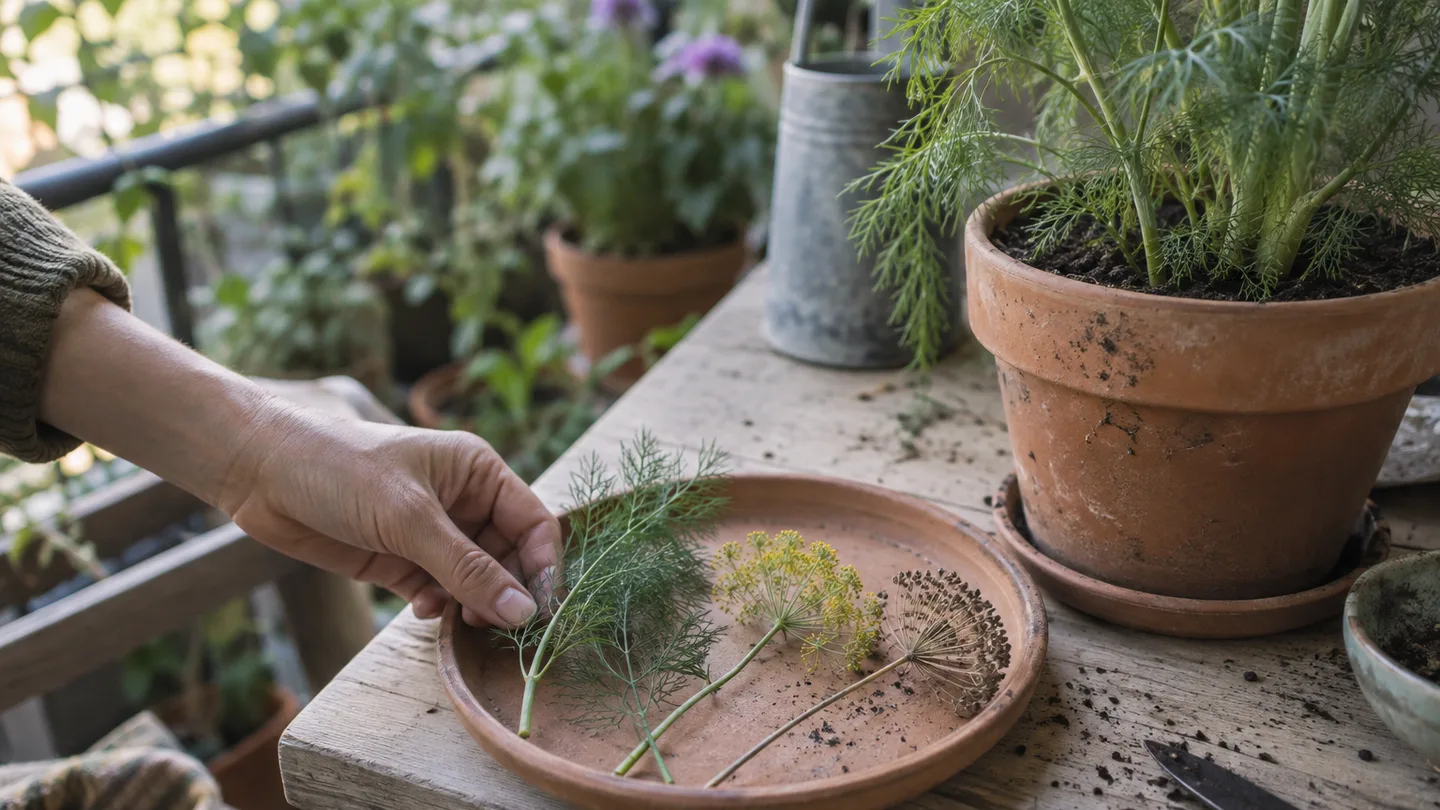
- Leaf harvest: Begin when the plant is around 15–20 cm tall (6–8 in), or when it has enough outer stems to spare. Take a few outer stems or fronds and leave the central growing point intact. As a conservative rule, remove no more than one-third of the plant at one time.
- Flower harvest: If you want the flat flower clusters, called umbels, wait until they have opened enough to show their structure but before they have dried completely. Cut the stem below the head and use the flowers promptly.
- Seed harvest: Leave the flower heads on the plant until the seeds turn tan-brown and feel dry. Cut the heads into a paper bag, allow any remaining moisture to finish leaving them, then separate the dry seeds.
The best leaf flavour usually comes before the central flower stalk rises strongly. Once the plant is putting its energy into flowering, the leaves can become finer and less substantial. That does not make the plant useless; it simply means you should choose whether the next harvest is leaves, flowers or seed instead of trying to get all three at their peak from one ageing stem.
My balcony rule is to treat dill as a succession crop rather than a plant I must keep perfect for an entire summer. I’d rather sow one pot, leave enough foliage for it to develop, then start the next pot before the first one flowers than crowd every available inch with seedlings. It is less tidy, but it gives me more chances at usable leaves.
One 8–12 litre pot is best viewed as a garnish and occasional-cooking supply, not a dependable source of large handfuls every day. Two or three pots sown in succession are a more realistic arrangement if you cook with dill regularly. The harvest will still vary with sun, heat, watering and how much you remove at each picking.
For readers planning a broader edible container garden, Fast growing vegetables in pots for beginners is a useful companion idea: give the crops with short harvest windows their own succession plan instead of expecting one pot to carry the whole season.
6. The 10-week check-in: when to intervene, and when to resow
Think of ten weeks as a flexible planning frame, not a deadline. Temperature, daylight, variety and sowing date can move every stage. The useful habit is to check what the plant is doing now and respond before a small problem becomes a failed harvest.
| Time from sowing | What to look for | What to do |
|---|---|---|
| Week 1 | Evenly damp mix and no crust over the seed | Check the top layer daily; water gently if it dries |
| Weeks 2–3 | Seedlings around 5–8 cm / 2–3 in tall | Thin to the strongest plants and final spacing |
| Weeks 4–6 | Enough foliage for light picking | Harvest outer stems and consider the first feed if the mix was pre-fed |
| Weeks 6–10 | Rapid height, a central stalk or flower buds | Harvest leaves, provide afternoon shade in heat and sow the next pot |
Use this symptom-to-cause-to-fix table before changing three things at once:
| Symptom | Check first | Practical fix |
|---|---|---|
| Yellow leaves and wet mix | Blocked holes, a saucer holding water or mix that stays saturated | Clear the holes, empty the saucer and allow the mix to approach the dry-check point before watering again |
| Limp leaves and dry mix | Whether water is running down the pot wall instead of through the root zone | Water slowly, pause and repeat until the mix is evenly damp |
| Thin, stretched stems | Low direct light or seedlings left too close together | Move to brighter light if possible and thin crowded plants |
| Flower stalk appearing early | Heat, dry spells, plant age or a cramped pot | Harvest what you can, shift to morning sun and afternoon shade, then resow |
| No seedlings after 14 days | Seed buried too deeply, surface dried out, cool conditions or old seed | Check the depth and moisture, then sow a fresh shallow patch rather than continuing to flood the old one |
Tomorrow, press a finger 2.5 cm into the mix, check that every drainage hole is open and write the sowing date on the pot. In a week, the seedlings should either be emerging or give you a clear reason to resow: too deep, too dry, too cool or simply crowded.