How to Dry Herbs: 4 Easy Methods That Keep Their Flavor
The best way to dry herbs without losing flavor is to remove moisture gently, away from bright light: hang sturdy stems, use a dehydrator for an even batch, use a low oven when you can control its heat, and save the microwave for a few leaves in a hurry. The finish matters more than the clock. A crisp leaf with a clean herbal smell is ready; a brown, cooked-smelling leaf has been heated too hard.
I use three checks throughout the process: keep the temperature modest, keep the herbs out of direct sun, and make sure moisture can escape instead of sitting inside a dense bundle or closed jar.
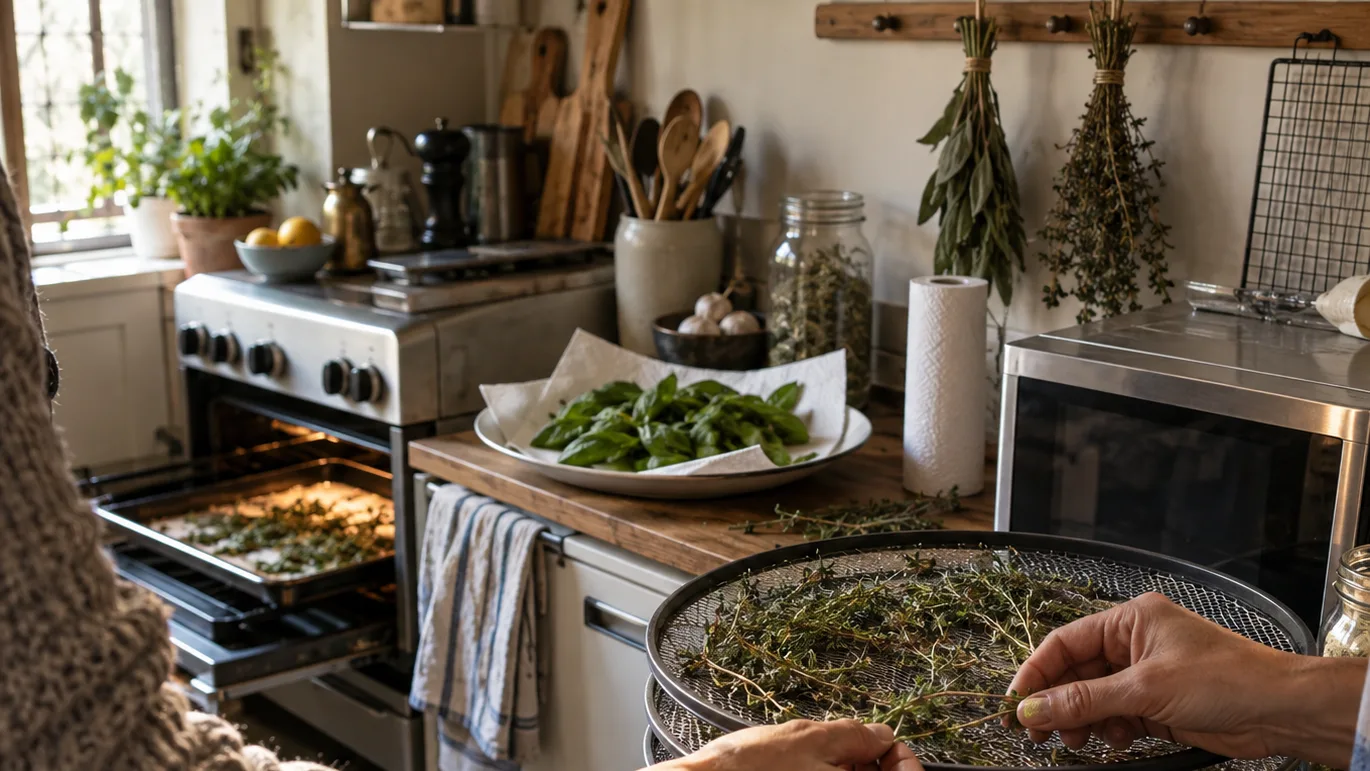
The flavor rule behind all four methods: dry herbs gently, in shade, and stop before they brown
Fresh herbs contain water and delicate aroma compounds. Drying removes the water so the leaves can be stored, but excessive heat can also drive off the smell that makes rosemary smell like rosemary or oregano taste more than dusty green flakes. Direct light can fade the colour and leave the finished herb less fragrant, which is why a shaded shelf is my default.
That gives me a simple rule for how to dry herbs: use the lowest heat or gentlest airflow that removes moisture completely. Air-drying is economical for sturdy herbs and small batches. A dehydrator is easier to control when I have a large harvest. An oven is useful when the room is damp, provided it genuinely runs low. The microwave is a rescue method for a few leaves, not my choice for a basketful.
None of these methods can improve herbs that were already old, bruised or weakly scented. Drying preserves the flavour the leaf has; it does not manufacture more. If the fresh sprig barely smells of mint, the dried version will not suddenly become powerful.
Before drying, get the leaves clean and genuinely dry to the touch
Preparation decides whether the drying stage is straightforward or frustrating. I start with healthy sprigs and remove yellow, damaged or insect-chewed leaves. Harvesting after morning dew has evaporated gives the drying method less surface water to remove.
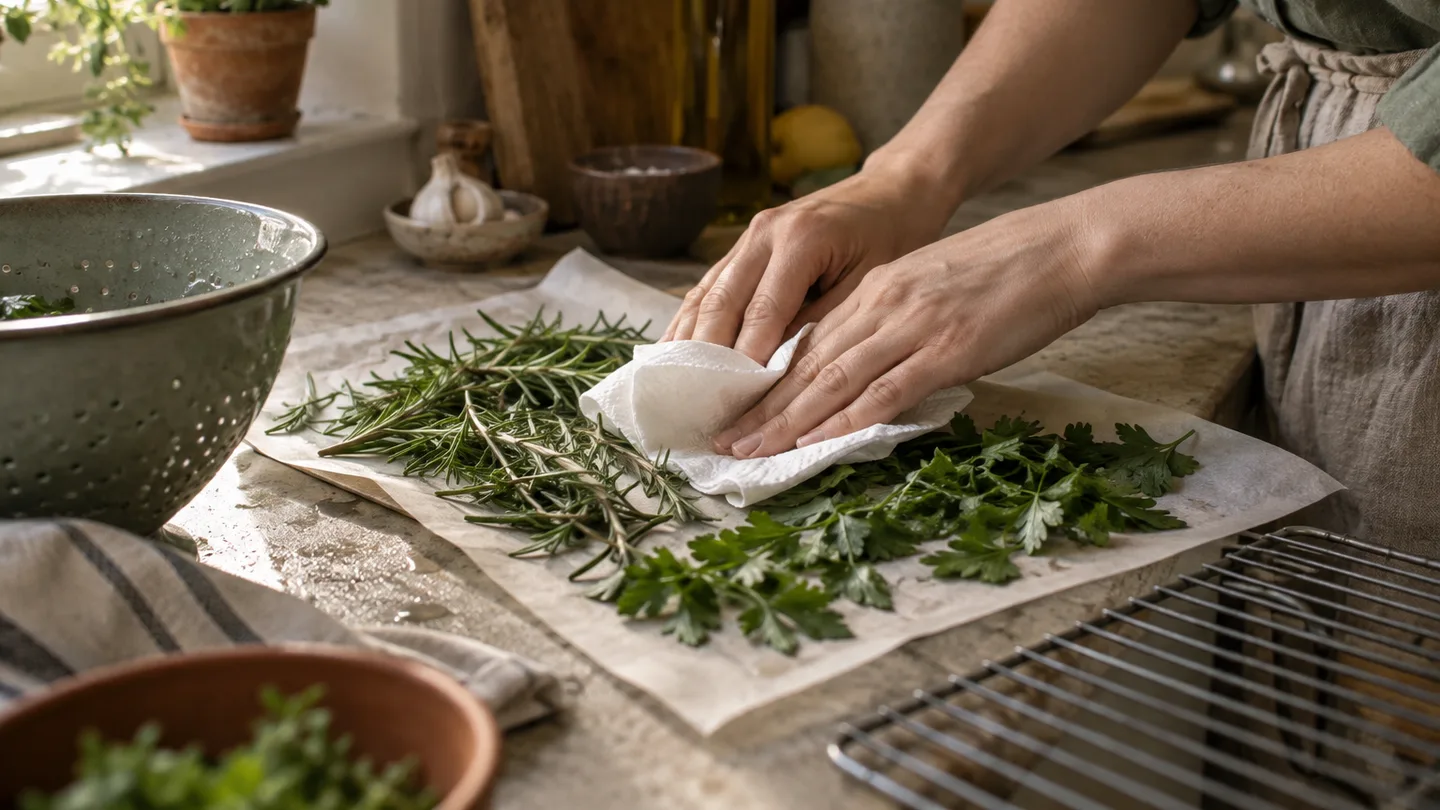
I wash herbs when they are visibly dusty, splashed with soil or carrying insects. If they are clean, skipping the rinse avoids adding another layer of moisture. When I do wash them, I use cool water, spin or shake away the excess, then blot the leaves and stems until they feel dry rather than slick.
- Cut or pick the herbs after surface dew has dried.
- Remove damaged leaves, weeds and debris.
- Wash only when the batch actually needs it.
- Spin, blot or air-drain the herbs until you cannot see droplets.
- Leave sturdy stems attached for hanging, but spread loose leaves out for tray drying.
Before choosing a method, hold a handful under the light. You should not see droplets, a glossy film of water or cool, wet clumps pressed together. Surface water has to evaporate before the herb itself can finish drying, so a wet starting batch takes longer and is more likely to dry unevenly.
In my own kitchen, this is where I used to rush. I would rinse a bundle, shake it once and put it straight on a tray. The outside leaves dried first while the leaves touching the tray stayed soft. Blotting the stems properly and giving every leaf a little space made the later checks much easier.
If the herbs are growing in pots, the related question is how much to water container plants before harvest. I aim for healthy, actively growing plants, but I avoid cutting immediately after a heavy watering if I can wait until the foliage is dry.
Air-drying works best for 5–10 stems at a time over 7–14 days
Air-drying suits rosemary, thyme, oregano, sage and other sturdy herbs with relatively firm leaves. I use about 5–10 stems per bundle. That is small enough for air to reach the centre without making the job needlessly fiddly.
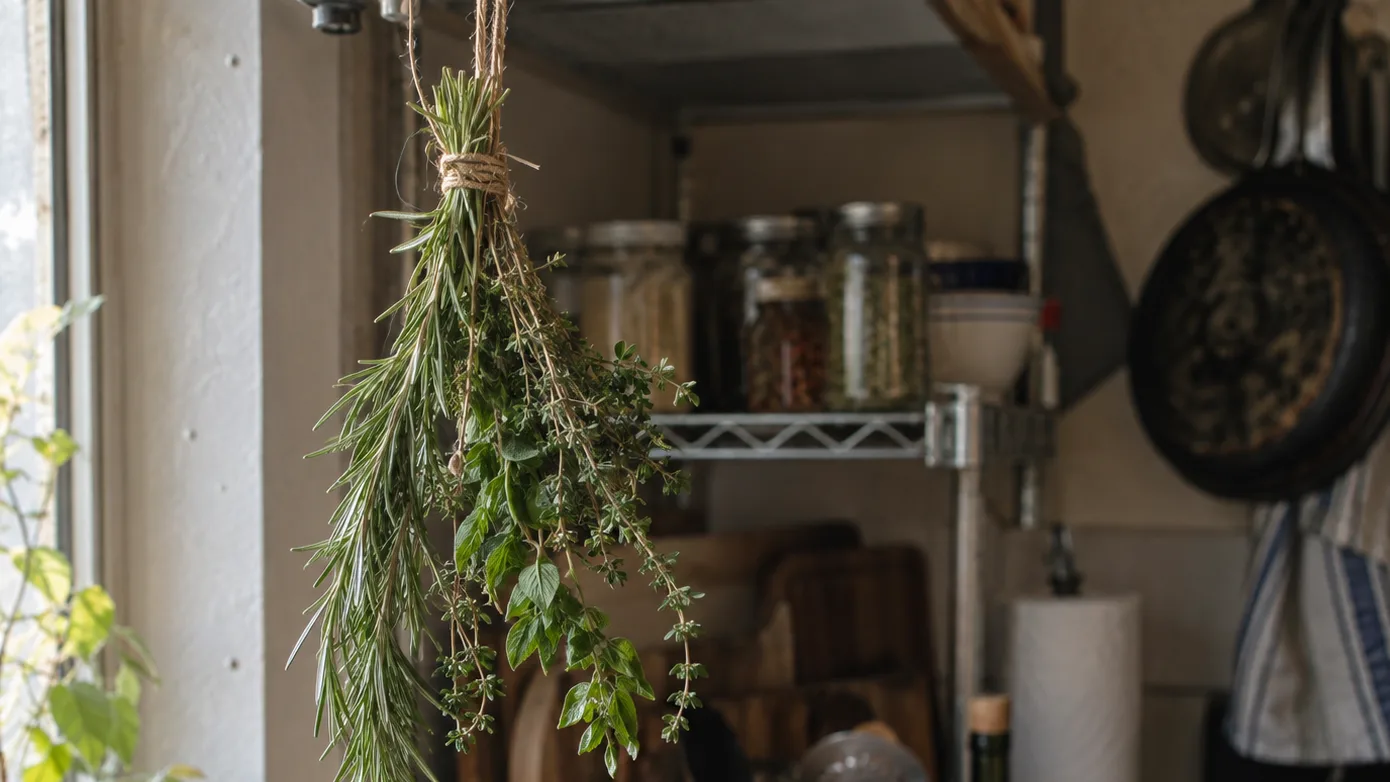
Remove the lower leaves where you will tie the stems, then fasten the bundle loosely with string or a small elastic band. The bundle should hold together without becoming a dense green fist. As the stems shrink, an elastic band keeps the bunch from slipping apart, but I still check that the centre is not packed tight.
Hang the bundle in a dry, shaded place with ordinary indoor airflow. Keep it away from a steaming kettle, cooker, sink splashes and a bright window. A little movement in the surrounding air helps moisture leave the leaves. A strong draft is less useful: it can scatter small leaves and dry the outside of a bunch before the middle catches up.
Most small, loose bundles take roughly 7–14 days in the conditions I am describing. A humid room, thick stems or a larger bunch can take longer. Check after the first week by rubbing one leaf between your fingers. If it feels leathery or cool in the centre, leave it hanging. If the leaf crumbles and the stem snaps instead of bending, it is close to ready.
Loose leaves that cannot be tied should go on a mesh rack, cooling rack or clean tray in a single layer. Turn them once if the underside remains soft. I would rather dry two small bundles than one oversized bunch; the extra tie takes a minute, while an uneven bundle can leave you guessing which leaves are actually finished.
Oven-drying: use the lowest setting, ideally 35–50°C / 95–120°F
The oven method is useful when the weather is damp or your kitchen has little spare airflow. Strip leaves from very thick stems if they would make a heap, then arrange the leaves in one layer on a tray. Crowding traps moisture between leaves and lets the outer surfaces finish before the centres.
I aim for the lowest workable temperature, ideally around 35–50°C / 95–120°F. If your oven cannot hold a low setting and runs hot, it may cook delicate herbs before they dry. A low number on the dial is not proof that the oven stays at that temperature, so inspect the first batch rather than trusting the setting blindly.
Leave the door slightly ajar only if that is safe for your appliance and kitchen. The opening can let humid air escape, but it is not worth creating a trip or burn hazard. Start checking at about two hours. Tender leaves may finish sooner; dense, leathery leaves and pieces left on thick stems may take longer.
Brown edges, a toasted smell or a brittle, darkened surface means the leaves have been heated more than gently dried. They may still be usable in a strongly flavoured stew if they do not smell burnt, but they will not regain their fresh colour or aroma in the jar. If your oven tends to run hot, I would choose air-drying or a dehydrator instead of trying to compensate with a shorter, hotter cycle.
A dehydrator gives the most even result at 35–45°C / 95–113°F
A dehydrator is my first choice for a large leafy harvest because the trays provide space and the fan keeps air moving steadily. Set the machine around 35–45°C / 95–113°F when it allows that range. Spread the leaves in a single layer, with enough room that they are not folded over one another.
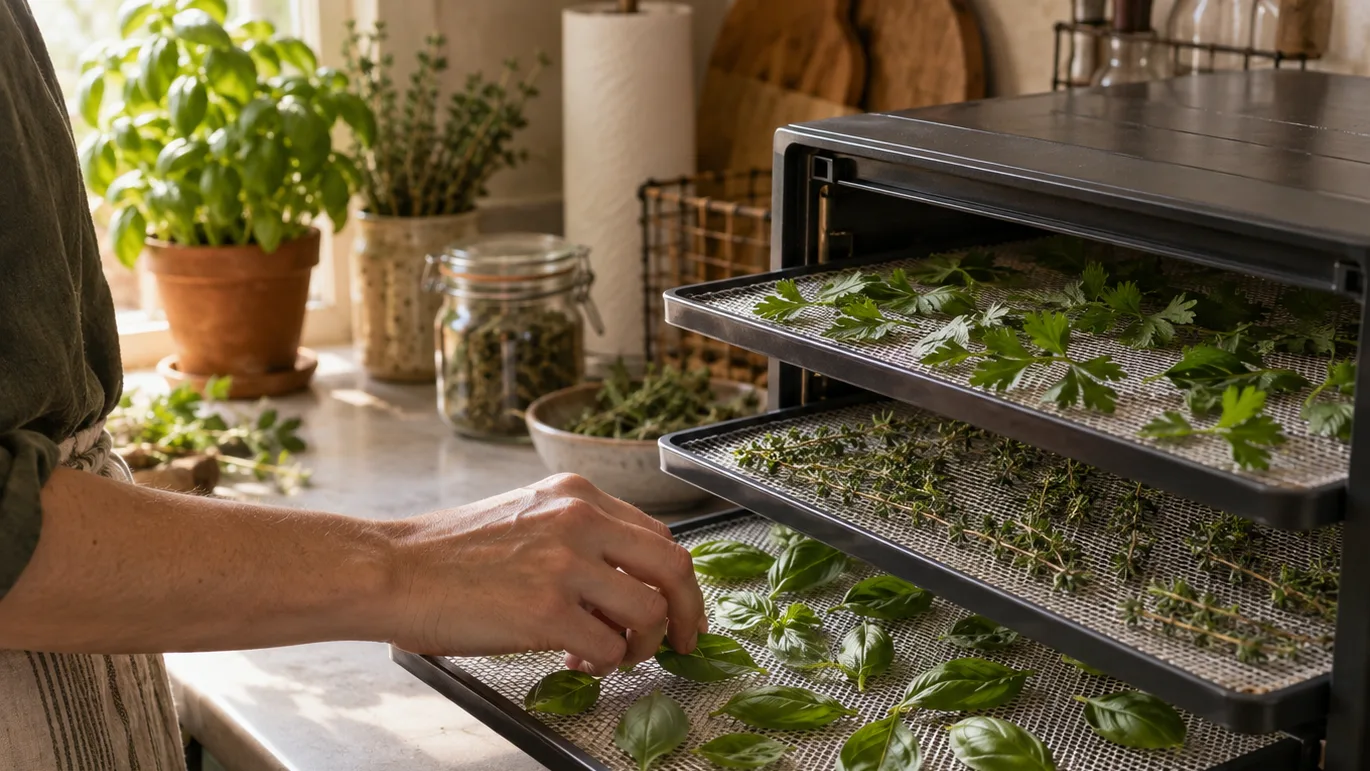
A broad working window is about 2–8 hours. Tender leaves can finish near the short end, while woody herbs, thick pieces and crowded trays need longer. Start checking before the longest estimate, especially if the leaves are small. A dehydrator moves air consistently, but it still cannot overcome a pile of overlapping leaves.
Check the thickest piece, not just the smallest leaf. If the centre bends, feels cool or has a flexible rib, return the tray for more drying. If the leaf is crisp throughout and the stem snaps cleanly, remove it and let the batch cool before packing.
The practical advantage is not that a dehydrator makes every herb taste better. It is that steady airflow gives me fewer hot and cool spots to manage than an oven, particularly when I am drying several trays at once.
Microwave-drying is the quick option: 20–30-second bursts for a small handful
The microwave can dry a small handful quickly, but it is the least forgiving method. Place clean, dry leaves in a single layer on or between dry paper towels. Use short 20–30-second bursts, checking and turning the leaves between bursts.
Stop when the leaves are crisp rather than waiting for a fixed total time. A small microwave load can go from fresh to scorched in another short burst, and the result changes with leaf thickness, starting moisture and appliance power. If the towels become damp, replace them before continuing.
This method suits a few leaves needed for tonight’s meal, not a basket of basil. Lightweight leaves can shift under the microwave’s airflow, edges may heat faster than centres and the batch needs close attention. If the leaves smell cooked, show dark spots or develop scorched edges, the microwave has gone beyond gentle drying.
The finish test is physical: crisp leaves, snapping stems and no cool soft spots
Time is only a guide. Let the herbs cool for a few minutes, then test the thickest leaf and the thickest stem. A finished leaf should feel crisp and crumble when rubbed. A finished stem should snap or break instead of bending like a fresh twig.
Do not confuse limp with dry. A leaf can feel light and look shrivelled while still holding moisture in its centre. Fold it. If it bends, feels leathery or has a cool soft patch, return it to the rack, tray or dehydrator. Check again after a short interval rather than adding a long, hot blast.
For a cautious final check, place the cooled herbs in a clean jar for several hours before committing the whole batch to storage. If the glass fogs or the leaves soften, moisture is still moving out of the plant material. Spread them back out and dry them again. Never seal warm herbs simply because they look finished; trapped heat can create condensation inside the container.
Store whole leaves in a small, dark airtight jar for the strongest flavor over 6–12 months
Let the herbs cool completely before stripping leaves from stems. Remove the woody stems, keep most leaves whole and crumble only the amount you need for cooking. Smaller pieces expose more surface area to air, so a jar of powder can lose its aroma faster than a jar of mostly intact leaves.
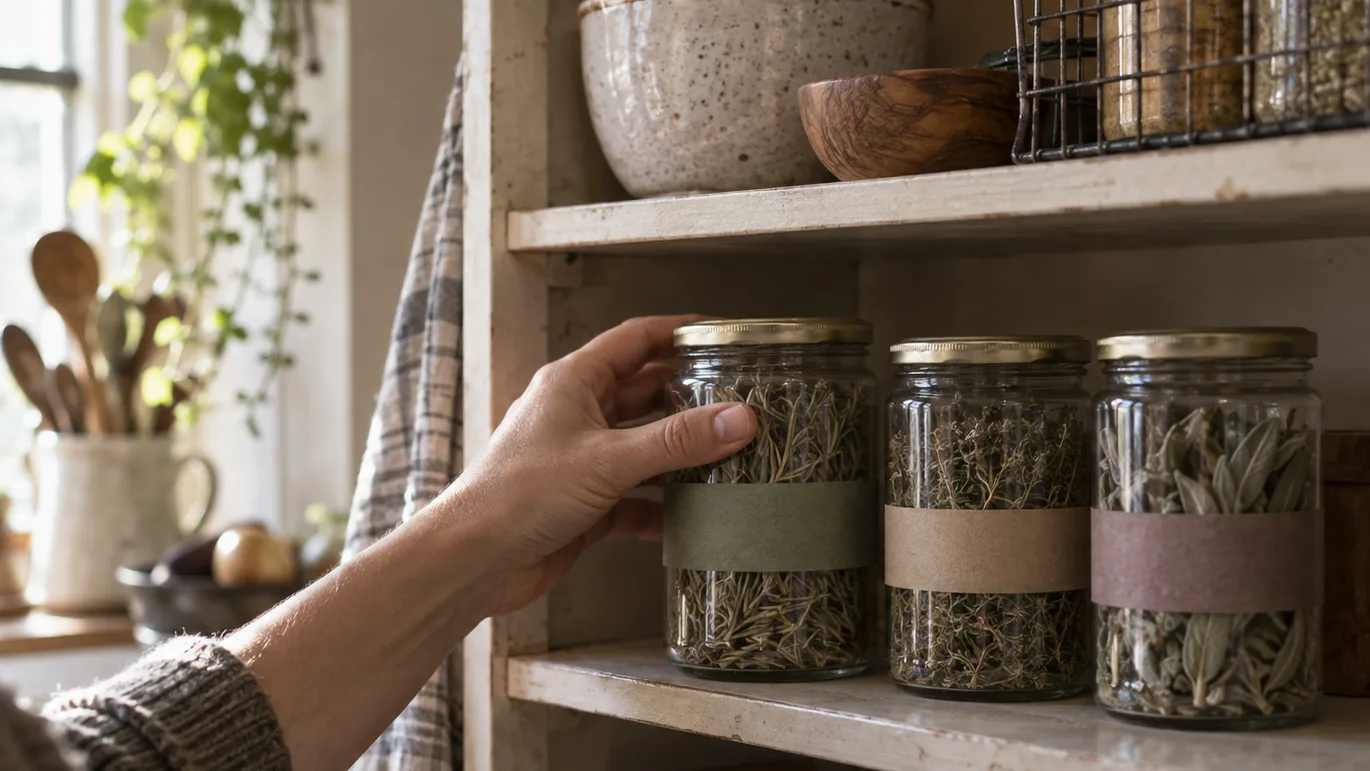
Use a clean, completely dry, food-safe container with a snug lid. Small glass jars work well because you can see condensation or colour changes without opening them repeatedly. Fill the jar without crushing the leaves, leave enough room to remove a pinch and label it with the herb and drying date.
Store the jar in a cool, dark cupboard rather than on a warm windowsill or beside the hob. Light, heat and repeated opening give the aroma more opportunities to fade. I treat 6–12 months as a useful quality window for the strongest flavour, not as a promise that every herb becomes unsafe on a particular date. If the leaves still smell clean but weaker, they may be worth using in a longer-cooked dish. If they smell musty or show mould, I discard them rather than trying to rescue the batch.
For a large harvest or jars you plan to give away, I would compare your process with university extension guidance on drying and storing culinary herbs, then check food-safety guidance for home-dried herbs and moisture control. The useful question is whether the herbs were dried fully and stored without reabsorbing dampness, not whether they were left in a machine for a particular number of minutes.
Choose the method by herb, weather and quantity—not by equipment alone
The most expensive-looking method is not automatically the best one. I choose by batch size, humidity and how closely I can watch the herbs. These time bands are working estimates, not guarantees; leaf thickness, starting moisture and appliance behaviour can shift them.
| Situation | Method I would choose | Working time | Main trade-off |
|---|---|---|---|
| Rosemary, thyme, sage or oregano in a small batch | Air-drying | About 7–14 days | Low effort, but it needs a dry room and patience |
| A large leafy harvest | Dehydrator | About 2–8 hours | Even and controllable, but it uses electricity and tray space |
| Damp weather with no dehydrator | Low oven | Often a few hours | Faster than hanging, but a hot oven can brown the leaves |
| A few leaves needed immediately | Microwave | Several short bursts | Fast for a small amount, but easiest to scorch |
| Very humid indoor air | Dehydrator or carefully watched oven | Depends on the batch | Controlled heat removes moisture more reliably than a dense hanging bunch |
My judgment call is to spend effort on the drying method only when the herb is worth preserving. A few sprigs of thyme deserve a loose hanging bundle because the setup is almost free. A large basil harvest deserves controlled moving air because handling dozens of damp leaves one by one is tedious. The microwave earns its place when dinner is already cooking and I need a spoonful, not when I am trying to stock a cupboard.
Musty, brown or weakly scented? Match the symptom to the drying mistake
Musty smell or softened leaves
Likely cause: the batch was packed before the centre was dry, or a dense bundle held moisture against the inner leaves. Fix: spread the herbs out again and inspect every leaf. If the smell is only faintly damp and there is no mould, I would dry the batch further and cool it before retesting in a clean jar. If the smell remains musty or you see mould, I discard it.
Brown edges, dark leaves or a toasted smell
Likely cause: excessive heat, direct sun or contact with a hot oven surface. Fix: lower the temperature, move the herbs away from the window and use a single layer. Brown leaves will not turn green again, so the practical decision is whether the remaining aroma is pleasant enough for a strongly flavoured cooked dish.
Some leaves are crisp while the bundle centre is soft
Likely cause: the bundle or tray was too crowded. The outside leaves had more access to moving air than the leaves in the middle. Fix: separate the stems, remove finished leaves and continue drying the soft ones in a single layer. This is why I prefer several small bundles to one large handful.
The dried herbs smell weak even though they are crisp
Likely cause: the fresh herbs were old, the batch was exposed to heat or light, or the leaves were crushed long before storage. Fix: keep future batches shaded, cool them before jarring and store most leaves whole. There is no storage trick that restores aroma compounds already lost during drying.
Three quick questions about drying herbs
Can I dry herbs in an air fryer?
Yes, if the appliance can run at a genuinely low temperature and hold the leaves in a single layer. Check frequently and keep lightweight leaves from blowing into the heating area. Many air fryers are designed for fast cooking rather than gentle dehydration, so I would use one only after checking its lowest setting and watching a small test batch.
Can I dry herbs in direct sunlight?
Sunlight can help remove moisture, but shade is usually my choice when colour and aroma matter. Direct sun may speed surface drying while also exposing the leaves to more heat and light. If the only suitable place is sunny, use a thin layer and check the herbs often rather than assuming the extra heat is an advantage.
Should I crumble dried herbs before storing them?
I keep most leaves whole and crumble only what I need for cooking. Whole leaves give less surface area to air, and they let me inspect the batch for softened or discoloured pieces. Once the leaves are in small flakes or powder, the jar is quicker to use but less forgiving of heat, light and repeated opening.
For your next batch, start with one small bundle rather than the entire harvest. Cut 5–10 sturdy stems after the foliage is dry, choose a shaded spot, and check the thickest leaf after a week. If it crumbles cleanly and the stem snaps, you have your first jar; if it bends or feels cool inside, give it more time before sealing it.
Frequently Asked Questions
Can I dry herbs in an air fryer?
Yes, if the appliance can run at a genuinely low temperature; use a single layer, check frequently and avoid the fan scattering lightweight leaves. Explain why many air fryers run hotter than ideal for delicate herbs.
Can I dry herbs in direct sunlight?
It can work for moisture removal, but shade is usually better for preserving colour and volatile oils. Explain the trade-off rather than presenting sun-drying as automatically unsafe or automatically best.
Should I crumble dried herbs before storing them?
Keep most leaves whole and crumble only the amount needed for cooking. Smaller pieces expose more surface area to air and tend to lose aroma faster.