Cheap Container Gardening Ideas: 15 Worthwhile Setups
The cheapest container garden isn’t a collection of tiny pots. A compact tomato needs roughly 20–30 L (5–8 gal) of potting mix, while microgreens can grow in 2–5 cm (1–2 in) of medium, so the wrong bargain container quickly becomes a watering problem instead of a harvest.
These 15 cheap container gardening ideas reuse buckets, totes, crates, trays and sacks without cutting the parts that matter: root volume, drainage, safe materials and enough light. My budget rule is simple: save money on the vessel, not on the crop’s basic growing conditions.
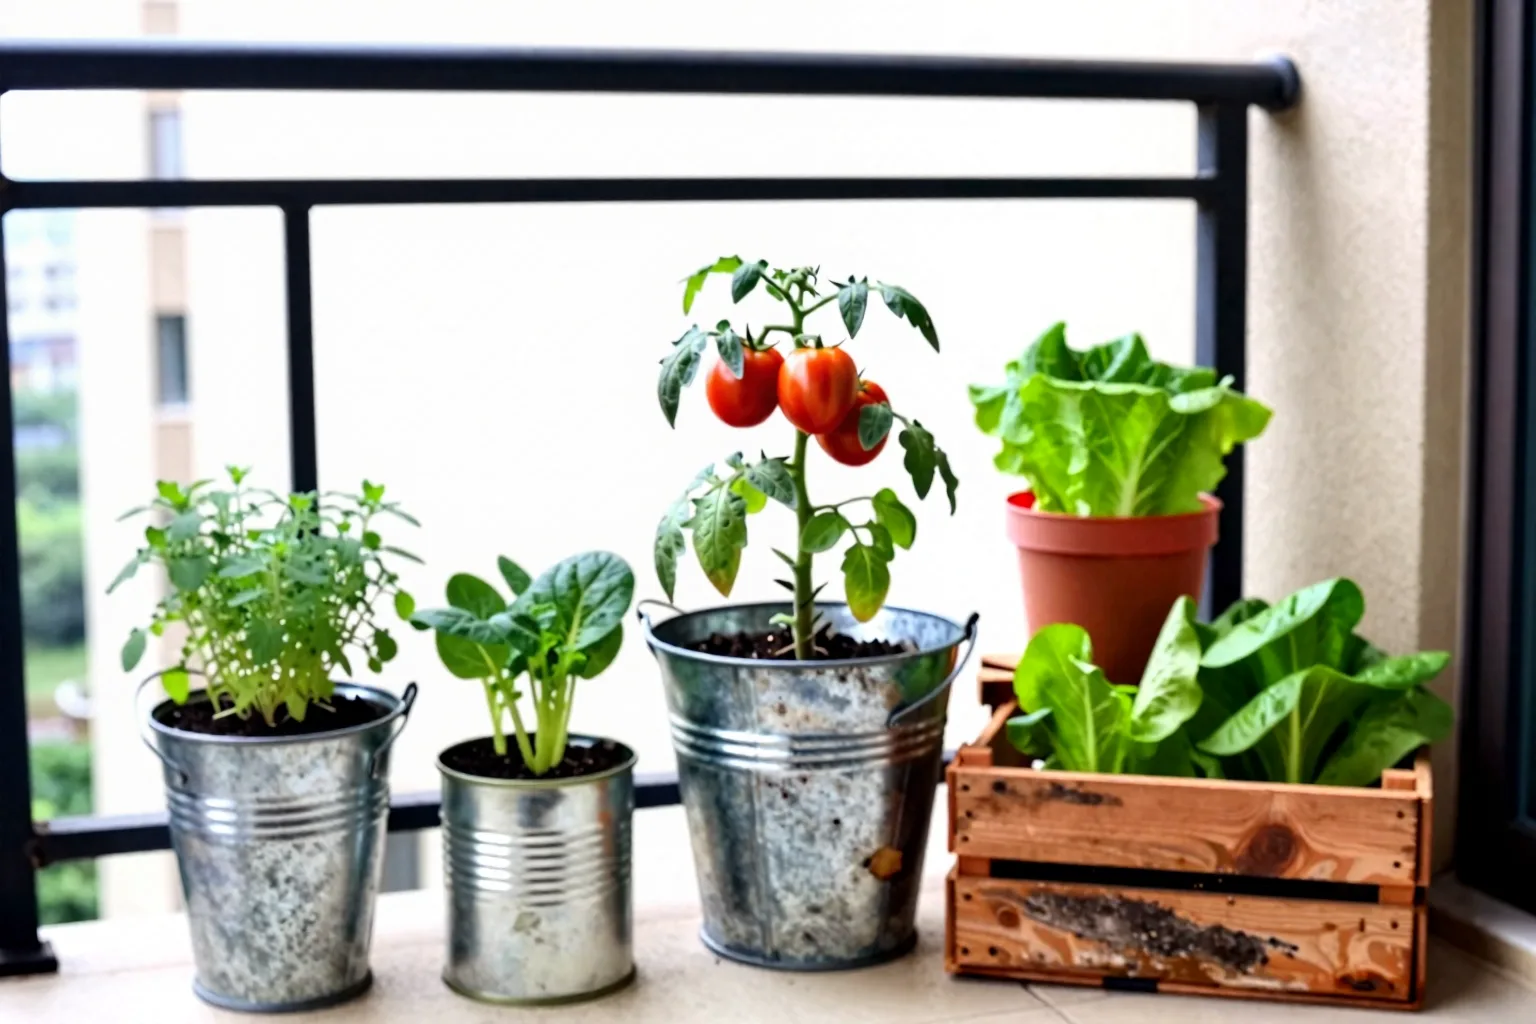
Before you reuse anything, set three limits: sun, root volume and weight
I’d make every container decision in this order: measure the vessel, record the usable direct sunlight, then choose the crop. Starting with a cheap container and trying to force a plant into it reverses the decision that determines success.
- Measure the root space. Measure the inside length, width and depth rather than relying on the label. A container’s volume to the rim is not quite the same as its usable volume because you need a little headspace for watering. A 60 cm × 30 cm × 12 cm tote, for example, has 21.6 L of geometric volume before headspace.
- Audit direct light. Leafy crops, herbs, green onions, radishes and microgreens are the sensible candidates for a balcony receiving roughly 1–3 hours of direct sun, especially if the rest of the day is bright. Fruiting tomatoes, peppers and cucumbers are a different budget decision; I’d reserve the brightest position for them and plan around roughly 6–8 hours of direct sun where possible. Use How to Audit Balcony Sunlight Before Buying Plants before buying seedlings.
- Check the load and the wind. Wet mix is heavier than dry mix, and a broad tote or tub holds more wet material than its empty appearance suggests. Elevated spaces also add wind: a tall plant can act like a sail, while a shallow pot can dry from its sides as well as its surface. Check your building’s balcony load limits and any rules about securing containers before filling large vessels.
A balcony receiving only two hours of direct sun deserves a crop shortlist built around best vegetables for a balcony with only two hours of direct sun, not a tomato purchased on optimism. Moving a pot can help it catch a brighter patch, but it cannot manufacture missing light.
| Crop group | Practical starting volume or depth | Light priority |
|---|---|---|
| Microgreens | 2–5 cm (1–2 in) of medium | Bright window light |
| Radishes and loose-leaf lettuce | 15–20 cm (6–8 in) of mix | Bright light or morning sun |
| Small herb or starter pot | 1–2 L; 3–6 L for a fuller herb pot | Brightest available window or ledge |
| Green onions and garlic greens | 5–10 L and about 15–20 cm (6–8 in) of mix | Bright light |
| Strawberries | 8–12 L (2–3 gal) | Bright light to direct sun |
| Bush beans | 15–20 L (4–5 gal) and 25–30 cm (10–12 in) deep | Full sun when possible |
| Compact tomato or pepper | 15–30 L (4–8 gal), depending on crop and variety | About 6–8 hours for fruiting |
| Potatoes or cucumbers | 30–40 L (8–10 gal) | Bright, sunny position |
The first false economy is ordinary garden soil in a small pot. Its fine particles can settle into a dense layer, slowing air movement and drainage around the roots; a purpose-made container mix is lighter and structured for repeated watering. The second is gravel in the base. It doesn’t create a magical drainpipe. Water can sit above the gravel in the finer mix, a condition called a perched water table: a wet band held above the coarse layer. The practical explanation is in Container Drainage Holes and the Perched Water Table: Why Gravel Fails.
I’d rather use one correctly sized reused vessel than buy three undersized pots. The container costs less, the crop dries more slowly, and there’s less repeated spending on replacement plants or extra mix.
Reuse these five vessels, but give each crop enough soil
Preparation order matters. First inspect the vessel for cracks, sharp edges, flaking coatings and an unknown chemical history. Wash it, confirm that its former contents were food-safe or known, add drainage holes at the lowest point, put the saucer or support in position, and only then add potting mix.
For many reused plastic vessels, an editorial starting point is several drainage holes about 8–10 mm (5/16–3/8 in) across rather than a single opening. The holes need to be open and low enough for water to leave; the exact number depends on the base shape. Fill the pot to about two fingers below the rim. That small gap catches the first pour and reduces mix washing over the edge.
Don’t turn a liner into a watertight bag. A food-safe liner can hold mix inside a crate, but it still needs openings that let excess water escape. For edible crops, I’d avoid chemical containers, uncertain treated timber and decorative glazes with an unknown history. Check guidance on food-contact materials for edible plants if the vessel’s past use or coating is unclear.
1. Food-grade bucket plus one compact tomato: 20–30 L (5–8 gal)
Choose a clean food-grade bucket, or one whose previous contents are known to be harmless, and give a compact determinate or cherry tomato 20–30 L of potting mix. A 20 L bucket can suit a compact plant; a large indeterminate tomato needs more root room, a stronger support and more attention to watering. Add several low drainage holes, set the stake before planting, and place the bucket where it can receive roughly 6–8 hours of direct sun.
In hot weather, check the mix rather than trusting a calendar. Push a finger 2–5 cm (1–2 in) into the surface, away from the stem. A bucket that is light, dry at that depth and wilting soon after watering is undersized for the plant’s demand or being exposed to too much heat and wind. Rapid wilting, a dark sunken patch at the blossom end of fruit, and a plant that dries again soon after a thorough watering are signals to inspect moisture consistency before adding more fertiliser.
2. Shallow storage tote plus cut-and-come-again lettuce: 15–20 cm (6–8 in) deep
A broad tote gives lettuce more harvest area than a narrow pot, but choose one that can hold 15–20 cm of mix. For scale, a 60 cm long × 30 cm wide × 12 cm deep tote calculates to 21.6 L before headspace; that 12 cm depth is a shallow compromise, not the depth I’d choose for a full-season lettuce box. Use a clean food-safe tote, distribute drainage holes across its base and sow small patches successively so one missed sowing doesn’t end the harvest.
Bright light or morning sun suits lettuce, while hot full sun can heat and dry shallow mix quickly. Crowded, bitter or collapsed leaves usually point me toward heat, tight spacing or a missed watering check before I blame the tote. In a hot position, move the box out of harsh afternoon sun while keeping it bright.
3. Salvaged produce crate with a liner for a small herb collection: 10–15 L (2.5–4 gal)
Use a sound produce crate and a food-safe liner to stop mix falling through the slats. Cut or puncture drainage openings in the liner so it behaves like a container rather than a sealed pouch, then add 10–15 L of mix. Basil, parsley and chives can share a similar watering routine more easily than rosemary and thyme, which are better allowed to dry somewhat between checks.
A crate exposed to wind dries at its sides as well as its top. Mixed herbs can therefore give contradictory signals: rosemary may be comfortable while basil wilts, or a shaded corner may stay wet while the exposed edge dries. My preferred fix is to place separate small pots inside the crate. You keep the attractive reused outer box, but each herb gets a root zone you can lift, inspect and water independently.
4. 15–20 L (4–5 gal) tub plus bush beans
A reused food-grade tub or nursery pot with 15–20 L of mix and roughly 25–30 cm of depth is a sensible home for bush beans. Direct-sow them at the spacing printed on the seed packet instead of filling the tub with seedlings for a faster-looking result. Seed is inexpensive, the plant doesn’t need a permanent large pot, and a short stake or simple support helps where wind catches the foliage.
Full sun is the best use of this setup when you have it. A tub can look lush and still harvest poorly if too many plants compete for the same finite water and root space. Overcrowding also closes the canopy, slowing air movement. Thin to the packet spacing while the seedlings are small; pulling out an extra plant then is less disruptive than trying to separate established roots later.
5. Colander or perforated bowl plus strawberries: 8–12 L (2–3 gal)
A clean colander or perforated bowl already solves much of the drainage problem. Use one larger strawberry plant in an 8–12 L vessel, or roughly two to three compact plants only if the spacing leaves each crown— the short central stem where leaves and roots meet — at soil level. Burying the crown invites trouble; leaving it exposed to dry air can also stress it, so settle the mix around it rather than covering its centre.
Give the bowl bright light, water around the root zone and expect the small vessel to dry more often than a deep tub. This is a worthwhile setup for a few fresh berries and runners, not a way to recreate a strawberry bed from one colander. If the leaves wilt each afternoon and the mix is dry 2–5 cm down, the cheap container is asking for more frequent checks, not a promise of a larger crop.
Use shallow, movable containers for the fastest harvests
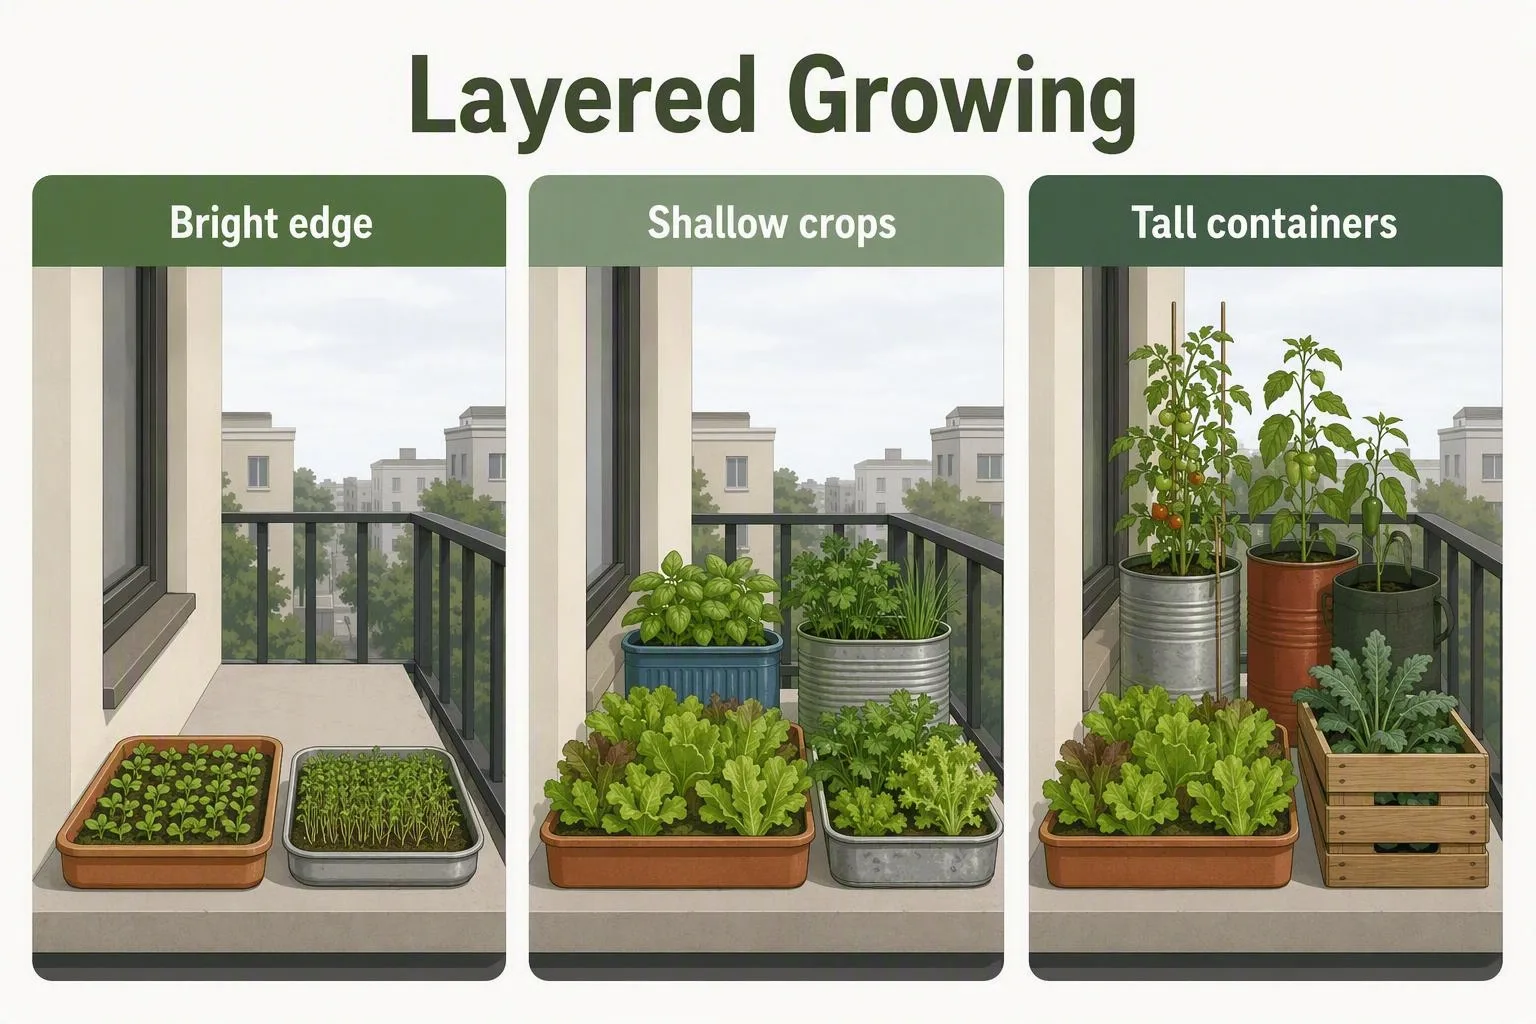
Windowsills, ledges and compact balconies reward crops that use little mix and reveal mistakes quickly. Put shallow greens at the brightest edge, keep taller containers behind them only where they won’t cast a long shadow, and leave movable pots within safe reach. A top-down placement plan is more useful than a pretty row of pots that shades itself.
Moving a container can chase the sun across a balcony, but it cannot replace the light a fruiting crop needs to flower and fill fruit. If the space gets only two hours of direct sun, use the phrase best vegetables for a balcony with only two hours of direct sun as a natural first shortlist. For a new balcony garden, quick leafy crops are my better test than a slow, expensive fruiting plant.
6. Three small pots on a windowsill for basil, parsley and chives
Three separate reused food-safe pots are easier to read than one crowded herb bowl. Allow roughly 3–5 L per parsley or chive plant and about 5–8 L for a productive basil plant, with drainage beneath each pot. The smaller 1–2 L herb figure in the earlier table is for a small single herb or short-term starter, not a promise that every mature basil plant will stay productive in that volume.
Rotate each pot toward the window so one side doesn’t stretch, and harvest by pinching tips rather than stripping a plant bare. A dark, wet windowsill produces weak, elongated growth because the plant is receiving little direct light while the mix dries slowly. Move the pot to the brightest safe position before increasing feed.
7. Clean takeaway trays for microgreens: 2–5 cm (1–2 in) of medium
Use a clean food-contact tray nested over a catch tray, add 2–5 cm of suitable growing medium and sow densely but not as a compressed mat. Bottom-water by adding water to the catch tray, allowing the medium to draw it upward, then emptying any remaining water. A common planning range for harvest is about one to three weeks, depending on the crop and the stage you want to cut; microgreens are seedlings, not mature vegetables.
Mould and collapse are the main failures to investigate. Stagnant water, poor airflow, contaminated seed and over-sowing all leave seedlings crowded and wet at the surface. If a disposable tray is cracked, badly scratched or cannot be cleaned without retaining residue, discard it rather than treating repeated reuse as automatically frugal.
8. A 5–10 L (1–2.5 gal) pot for green onions or garlic greens
A 5–10 L pot with about 15–20 cm of mix gives repeated sowings of green onions or a useful place to harvest garlic leaves. Add drainage holes and keep it in bright light. Growing onions from seed is different from pushing supermarket roots back into a pot: regrown roots commonly provide a limited repeat harvest, not an endless supply, because the original bulb’s stored energy is finite.
Harvest outer leaves while leaving the centre growing point intact. A permanently soggy pot shows yellowing, soft growth or a stale smell in the mix; temporary wilting with a very light, dry pot points in the opposite direction. Check 2–5 cm down before watering so a damp surface doesn’t make the decision for you.
9. Narrow window box for radishes or baby carrots: 15–25 cm (6–10 in) deep
Choose the root crop to fit the depth. About 15 cm can suit radishes, while baby carrots need closer to 20–25 cm and a loose, stone-free mix. A broad window box uses its surface efficiently for direct sowing, but compacted mix or crowded seedlings tend to produce forked, undersized roots instead of smooth ones.
Keep the surface evenly moist during germination, then thin to the packet spacing. If the box sits in fierce afternoon sun, move it to bright morning light where possible; a shallow root zone heats and dries faster than a deeper container. For the arithmetic before you shop, compare the required volume with How much soil does a 5-gallon bucket hold? Container volume chart, then measure your actual box rather than assuming its label is exact.
10. One compact pepper in a 15–20 L (4–5 gal) pot
Give one compact pepper plant a stable 15–20 L pot and roughly 6–8 hours of direct sun where possible. Fit a stake before the canopy becomes heavy, keep the roots warm and check moisture consistently while the plant is flowering. A modest feeding rhythm is preferable to trying to compensate for weak light or a tiny pot with extra fertiliser.
Flowers that drop or fruit that stays small can follow cold roots, irregular watering, inadequate light or excessive nitrogen. Those causes call for different fixes, so inspect the light and the moisture depth before reaching for a stronger feed. A 4 L pot may keep a pepper alive, but I wouldn’t spend a premium seedling on it unless frequent watering and a small final plant are acceptable trade-offs.
Add only one support or reservoir when it changes the result
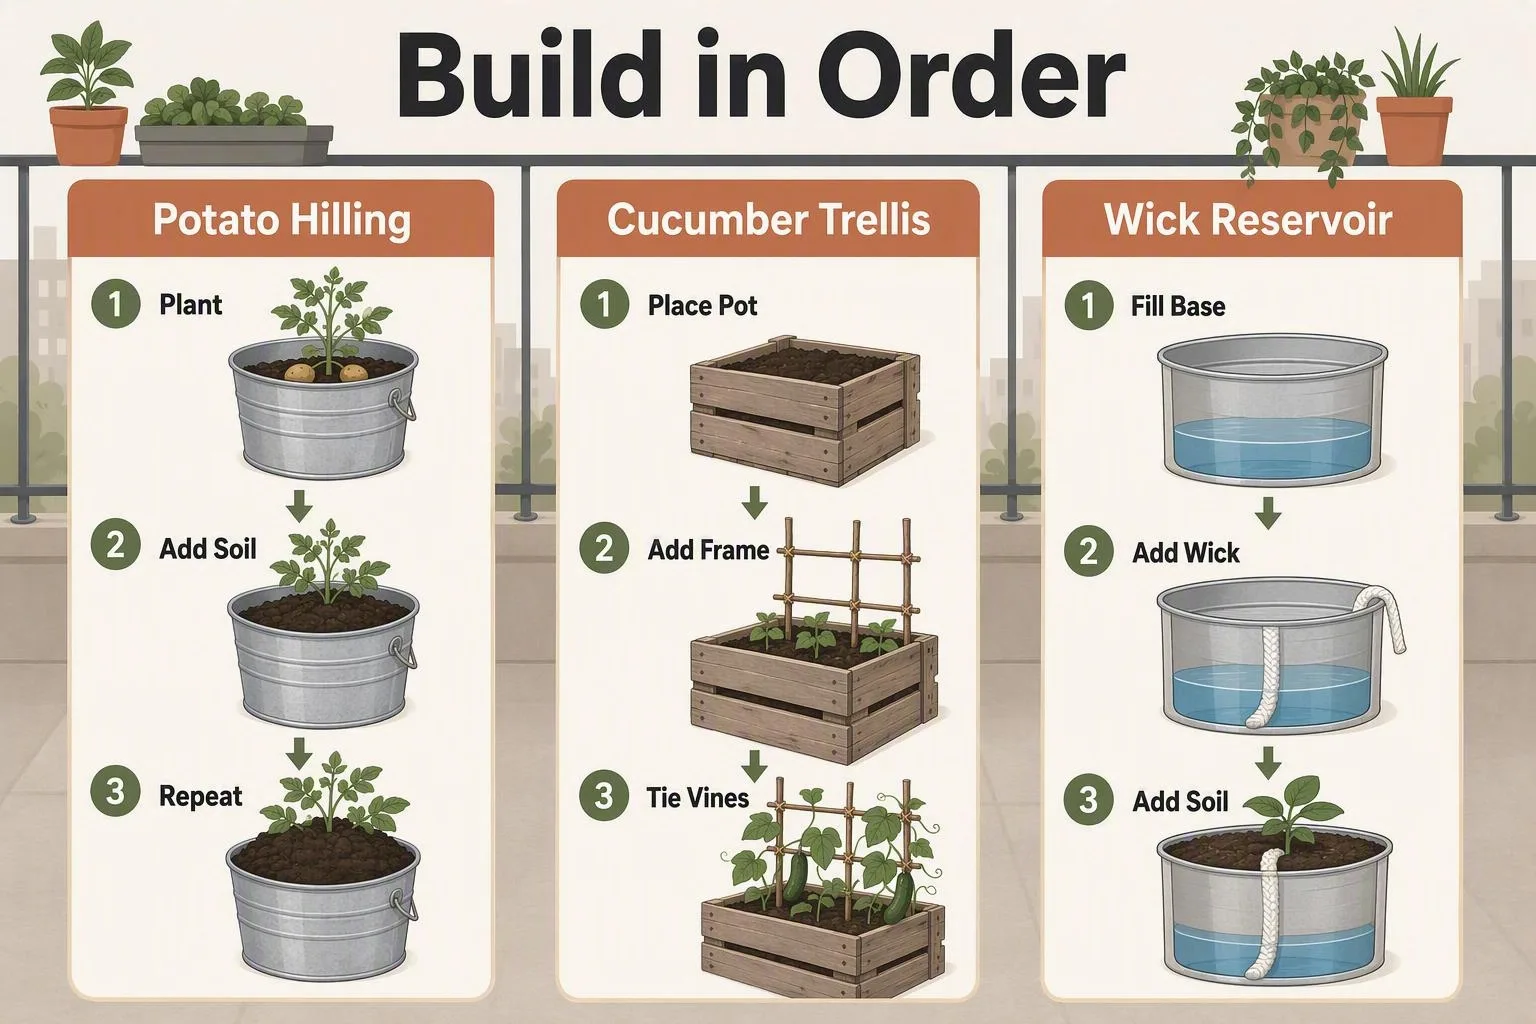
The next five ideas cost little only if the extra feature solves the crop’s actual constraint. Add a trellis when a vine needs vertical space, use hilling when a potato plant needs more mix around developing stems, and try wicking when a reservoir can move water into the mix between checks. Wicking means a strip or column of absorbent material carries water upward from a reservoir; it doesn’t mean the roots should sit in a permanently flooded chamber.
Build the support or reservoir first, test it, and plant second. A trellis added after roots and vines are established can disturb the root ball, while a reservoir without an overflow can turn a water-saving idea into a saturated pot. A cutaway view helps here because the order of the layers is the whole trick.
11. A 30–40 L (8–10 gal) grow bag or safe woven sack for potatoes
Use a clean, food-safe woven sack or an existing grow bag with drainage and 30–40 L of mix. Start with the seed pieces in the lower portion, then add more mix around the lower stems as foliage rises. That staged covering is hilling: the leaves stay exposed while the developing underground stems receive more covered space. Do not fill the bag to the rim on planting day.
Container potatoes are a space experiment, not a guaranteed high-yield shortcut. Waterlogged roots follow blocked drainage or saturated mix; green tubers show that light reached potatoes near the surface; and a soft-sided bag can collapse or tip in wind. Put the bag on a stable base, keep drainage clear and add mix in stages. If the bag leans, fix its support before the foliage makes the imbalance worse.
12. One cucumber in a 30–40 L (8–10 gal) bucket with a salvaged trellis
Pair one compact or bush cucumber with a stable 30–40 L bucket and a trellis made from canes, wire or other smooth, safe material. Fix the support before planting because pushing stakes through an established root zone can damage roots, and a fruiting vine can make the container top-heavy. Give it full sun where possible, check moisture frequently in wind and anchor the bucket so it cannot tip.
A cucumber with plenty of leaves but few usable fruits may be dealing with irregular watering, poor pollination, heat stress or an unsuitable variety. More fertiliser is not a universal answer. Inspect the support, light, moisture pattern and variety before spending money on amendments.
13. A nested tote with a wick for lettuce on an irregular-watering balcony
Treat a self-watering tote as a targeted upgrade, not a universal cheap hack. Use a clean outer tote as the reservoir, a raised inner planting area or wicking column, an overflow opening below the mix line and a potting mix that can move water without staying saturated. Test the wick and overflow with water before adding seedlings.
The reservoir can lengthen the interval between checks, but it cannot correct poor light, blocked drainage or a root zone that remains wet. Sour-smelling mix, yellowing leaves and fungus gnats are reasons to inspect the air space and overflow, not to keep topping up the reservoir. Periodically check that the wick is actually damp and that the overflow still opens; a self-watering container is a system that needs inspection.
14. A broad 15–20 L (4–5 gal) tub for ginger as a long-season experiment
Ginger suits a broad 15–20 L tub with roughly 20–30 cm of loose potting mix and a warm position. Plant a viable rhizome piece shallowly, keep the mix only lightly moist until shoots appear, then water more consistently during active growth. As the foliage yellows toward dormancy, reduce watering rather than keeping the tub wet.
The common mistake is assuming a dormant rhizome has failed and soaking it until it rots. A slow start with a firm rhizome and no foul smell is different from a soft, collapsing piece in saturated mix. Ginger is a long-season experiment, so it is a poor first choice if the main goal is the fastest return from one bag of mix.
15. A 15–20 L (4–5 gal) box for peas with a twig or string trellis
Use a 15–20 L box with about 20–30 cm of mix for peas, choose a cool-season sowing window and add a twig, netting or string support before the vines need it. Seed and an improvised trellis do most of the work, which makes peas a good low-cost crop. The small box dries faster once foliage covers its surface, so keep checking the mix beneath the canopy.
Heat can shorten the season. Tangled, mildew-prone vines with few pods point me toward missing support, overcrowding, hot conditions or irregular moisture. Thin according to the packet, guide young vines onto the support early and move the box from reflected afternoon heat if the location allows.
The no-waste buying order: mix first, containers second
Before spending money, make a list of the vessels you already have and assign each one a crop. The table below is a shopping filter, not a promise that every plant will perform identically. Variety, weather, light reflected from nearby walls and the time available for watering can change the result.
| Setup | Minimum working specification | Light | Don’t economise on |
|---|---|---|---|
| Compact tomato | 20–30 L (5–8 gal) | About 6–8 hours direct | Potting mix and stake |
| Cut-and-come-again lettuce | 15–20 cm (6–8 in) depth | Bright light or morning sun | Loose mix and spacing |
| Herb crate | 10–15 L (2.5–4 gal) | Bright position | Food-safe liner with drainage |
| Bush beans | 15–20 L (4–5 gal), 25–30 cm deep | Full sun where possible | Packet spacing |
| Strawberries | 8–12 L (2–3 gal) | Bright light to sun | Crown placement |
| Windowsill herb trio | 3–5 L parsley or chives; 5–8 L basil | Brightest safe window | Separate drainage |
| Microgreens | 2–5 cm (1–2 in) medium | Bright window light | Clean tray and airflow |
| Green onions or garlic greens | 5–10 L; 15–20 cm mix | Bright light | Drainage |
| Radishes or baby carrots | 15–25 cm (6–10 in) depth | Bright light, less hot afternoon | Loose, stone-free mix |
| Compact pepper | 15–20 L (4–5 gal) | About 6–8 hours direct | Stable pot and consistent moisture |
| Potatoes | 30–40 L (8–10 gal) | Bright, sunny position | Drainage and staged hilling |
| Cucumber | 30–40 L (8–10 gal) | Full sun where possible | Anchored trellis |
| Self-watering lettuce tote | Room for a 15–20 cm root zone | Bright light | Overflow and wick test |
| Ginger | 15–20 L; 20–30 cm depth | Bright, warm position | Loose mix and dry-down at dormancy |
| Peas | 15–20 L; 20–30 cm depth | Cool-season bright light | Early support |
Repeat the volume maths instead of guessing. For a rectangular vessel, multiply length × width × depth in centimetres and divide by 1,000 to get litres. For a cylinder, multiply π × radius × radius × depth, using centimetres, then divide by 1,000. The 60 × 30 × 12 cm tote works out as 60 × 30 × 12 ÷ 1,000 = 21.6 L to the rim. Actual mix is slightly lower if you leave headspace.
For a bucket or tub, compare that calculation with How Much Potting Mix Does a Container Need? A Litres-and-Gallons Chart and How much soil does a 5-gallon bucket hold? Container volume chart. The printed gallon label may describe an approximate container class rather than the exact litres available to roots.
- Measure first. Write down internal dimensions and mark which vessels are food-safe or known-safe. Do not use containers that held pesticides, solvents, oils or other chemicals.
- Log the light. Check the balcony or windowsill at morning, midday and afternoon for a week. Record direct sun, not just how bright the space feels. Bright shade and direct sun are useful to different crops.
- Total the litres. Add the required volumes for the plants you can genuinely place in the brightest positions. Buy container potting mix by the printed litre volume, not by the vague promise that one bag will fill everything.
- Prepare drainage before planting. Drill the holes, place the vessel on its final support and pour in water to confirm that the openings are clear. Don’t add gravel to the base as a substitute for holes.
- Plan the weekly check. In a plastic pot in full sun and wind, a thirsty crop may need checking daily; in a glazed pot in part shade, the same crop may go several days between checks. Use the surface and a 2–5 cm finger check rather than a fixed schedule. How Often to Water Vegetables in Pots in Heat and Wind is the next useful reference once the pots are planted.
- Buy the crop last. Choose seeds or seedlings only after the vessel, light and support are assigned. If the crop needs a larger pot than the balcony can safely hold, switch crops instead of shrinking the root zone.
Before the weekend, gather the containers you already own, measure them, and write their litres on masking tape. Over the following week, record where direct sun actually lands. Then drill and test drainage while every pot is still empty; that is the cheapest moment to discover that a bargain vessel is unsafe, too shallow or impossible to water evenly.